The efficiency and efficacy of any metalwork, woodworking, or surface treatment tasks are inescapably dependent on the choice of the right sandpaper . Choosing the right texture and granularity – often defined as the sandpaper grade and grit – is not just a minuscule pre-choice, but a preeminent precept toward the resolute confluence of clear, quality results. Understanding sandpaper grit – a seemingly diaphanous act, yet central to the dexterity of this tactile frame – is thus encapsulated within a larger scenario of high-impact manufacturing and restoration undertakings. How gritty, is too gritty? A fiery conversation transcending from mere sand paper grades to a sonic epiphany around the engineering of idea-laden cataracts. This time-memorial document, thus, aims to elucidate a light on the quest around what grit sandpaper for wood , for metals, and for residential upkeep - the sandpaper grades that form the appendices of UK's crafts, the cogs of its forge.
Sanding is an essential process in many woodworking and DIY projects. It helps to smooth surfaces, remove imperfections, and prepare surfaces for painting or staining. However, not all sandpaper is created equal. Different sandpaper grits and grades are designed for specific tasks, and understanding them can make a big difference in the outcome of your project.
When it comes to sandpaper, the grit refers to the size of the abrasive particles on the paper. The higher the grit number, the finer the particles and the smoother the finish. Lower grits, such as 60 or 80, are used for heavy-duty sanding, like removing paint or shaping wood. Medium grits, like 120 or 150, are ideal for general sanding and smoothing surfaces. Higher grits, such as 220 or 320, are used for finishing touches and achieving a polished look.
how to get slime out of clothes
It's important to note that sandpaper grades can vary between different manufacturers, so it's a good idea to check the packaging for specific recommendations. Additionally, some sandpapers are labeled with both the grit number and the grade, which indicates the type of material the sandpaper is best suited for. For example, a sandpaper labeled 'medium, 120-grit' is designed for general sanding on a variety of surfaces.
When using sandpaper, it's crucial to start with a lower grit and gradually work your way up to a higher grit. This ensures a smooth and even finish, as each grit level removes the scratches left by the previous one. It's also important to use the proper sanding technique, applying even pressure and moving the sandpaper in a consistent motion. Remember to change the sandpaper frequently to maintain its effectiveness.
In conclusion, understanding sandpaper grit and grades is essential for achieving the desired results in your woodworking and DIY projects. By selecting the appropriate grit and using the proper sanding technique, you can ensure a smooth and professional finish on any surface.
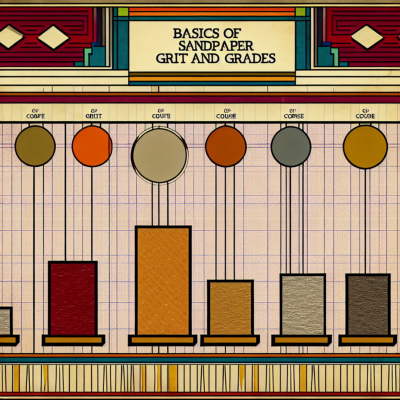
Basics of Sandpaper Grit and Grades
Sandpaper is a versatile tool used for smoothing and shaping various surfaces. It consists of abrasive particles adhered to a paper or cloth backing. One of the most important factors to consider when using sandpaper is the grit and grade.
The grit of sandpaper refers to the size of the abrasive particles. It is measured in terms of the number of particles per square inch. The higher the grit number, the smaller and finer the particles. Lower grit numbers are used for rough sanding and removing material quickly, while higher grit numbers are used for fine sanding and achieving a smooth finish.
The grade of sandpaper indicates the level of coarseness or fineness. It is usually represented by a letter or a combination of letters. The most commonly used grades include coarse (C), medium (M), fine (F), and very fine (VF). Coarse grades are used for heavy material removal, while fine grades are used for final finishing and achieving a polished surface.
When choosing sandpaper, it is important to consider the specific task at hand and the material being worked on. For rough sanding or removing paint and varnish, a lower grit and coarse grade sandpaper is suitable. For achieving a smooth finish or polishing, a higher grit and fine grade sandpaper should be used.
It is also important to note that sandpaper should be used progressively, starting with a lower grit and gradually moving to a higher grit. This ensures a smoother transition and helps prevent visible scratches and marks on the surface being worked on.
In summary, understanding sandpaper grit and grades is crucial for achieving the desired results in various sanding tasks. By selecting the appropriate grit and grade based on the specific task and material, you can achieve a smooth and professional finish.
How do I know what grit sandpaper to use?
Choosing the right grit sandpaper for your project is crucial to achieving the desired results. The grit of sandpaper refers to the size of the abrasive particles on the sandpaper surface. The higher the grit number, the finer the abrasive particles, and the smoother the finish will be.
Here are some guidelines to help you determine what grit sandpaper to use:
- Coarse grit (40-80): Use coarse grit sandpaper for heavy material removal, such as stripping paint or smoothing rough surfaces. This grit is ideal for initial sanding on wood that has significant imperfections or roughness.
- Medium grit (100-150): Medium grit sandpaper is commonly used for general sanding and smoothing out the surface. It is suitable for removing minor imperfections, preparing surfaces for painting or staining, and shaping wood.
- Fine grit (180-240): Fine grit sandpaper is used for achieving a smooth finish and removing small imperfections. It is often used for final sanding before applying a finish, such as varnish or paint.
- Extra-fine grit (320+): Extra-fine grit sandpaper is used for the final stages of sanding, producing an ultra-smooth surface. It is commonly used for sanding between coats of finish or for delicate surfaces, like metal or plastic.
It's important to note that the specific grits used may vary depending on the project and the material being worked on. It's always a good idea to start with a coarser grit and progressively move to finer grits for a smoother finish. Experimentation and test sanding on a small, inconspicuous area can help determine the best grit for your specific project.
Remember to always follow the manufacturer's recommendations for the sandpaper grit and consider the level of finish you want to achieve. By choosing the right grit sandpaper, you can ensure a successful and professional-looking result.
What is 240 grit sandpaper used for?
240 grit sandpaper is a medium-coarse sandpaper that is commonly used for sanding wood surfaces. It is slightly finer than 220 grit sandpaper, but still provides enough abrasive power to remove scratches, smooth rough edges, and prepare surfaces for painting or staining.
This grit is often used during the initial sanding stages of a project, particularly when the surface is in need of moderate smoothing. It can effectively remove old finishes, such as paint or varnish, and help to even out imperfections in the wood.
240 grit sandpaper is also suitable for sanding between coats of paint or primer. It can help to create a smooth and even surface, allowing for better adhesion of subsequent layers. Additionally, this grit can be used to lightly sand between layers of clear coat or topcoat to achieve a smoother finish.
When using 240 grit sandpaper, it's important to apply moderate pressure and move the sandpaper in a consistent direction, following the grain of the wood. This will help to avoid creating uneven and visible sanding marks.
Summary:
240 grit sandpaper is a medium-coarse sandpaper that is commonly used for sanding wood surfaces. It is effective for removing old finishes, smoothing rough edges, and preparing surfaces for painting or staining. It is also suitable for sanding between coats of paint or primer and achieving a smooth finish. When using 240 grit sandpaper, it's important to apply moderate pressure and sand in the direction of the wood grain.
What is 1000 grit sandpaper used for?
1000 grit sandpaper is considered a fine grit sandpaper and is commonly used for the final sanding stages of a project. It is designed to smooth and refine the surface, removing any remaining imperfections or roughness.
This type of sandpaper is often used in woodworking and finishing applications, such as preparing wood for staining or painting. It can also be used to sand down metal surfaces, such as removing rust or preparing a surface for painting.
When using 1000 grit sandpaper, it is important to be gentle and use light pressure to avoid removing too much material. It is also important to use a sanding block or a sanding tool to ensure an even and consistent sanding surface.
It is worth noting that 1000 grit sandpaper is not typically used for heavy material removal or for shaping surfaces. It is best suited for fine finishing work and achieving a smooth, polished result.
In summary, 1000 grit sandpaper is used for final sanding and finishing stages to achieve a smooth, refined surface. It is commonly used in woodworking and finishing applications and is best suited for fine detailing and polishing work.
Choosing the Right Sandpaper for Different Materials

When it comes to sanding different materials, it is important to choose the right sandpaper grit and grade for optimal results. The type of material you are working with will determine the type of sandpaper you should use. Here are some guidelines to help you select the appropriate sandpaper for different materials:
777 angel number
| Material | Suggested Sandpaper Grit | Suggested Sandpaper Grade |
|---|---|---|
| Wood | Coarse grit (60-80) | Medium grade (C) |
| Metal | Fine grit (120-220) | Medium grade (C) |
| Plastic | Medium grit (80-120) | Medium grade (C) |
| Drywall | Very fine grit (220-400) | Medium grade (C) |
| Glass | Extra fine grit (400-600) | Medium grade (C) |
It is important to note that these suggestions are general guidelines and may vary depending on the specific project or desired outcome. Additionally, it is recommended to start with a lower grit and gradually move to higher grits for a smoother finish.
Choosing the right sandpaper for different materials will ensure that you achieve the desired result while minimizing the risk of damage to the surface. By considering the material and using the appropriate grit and grade, you can achieve a smooth and professional finish for your project.
What grit sandpaper is best for all around?
When it comes to choosing the best grit sandpaper for all-around use, it's important to consider the specific task at hand. Different grits are designed to tackle different materials and achieve different finishes. However, if you're looking for a versatile option that can handle a variety of projects, a medium grit sandpaper is often a good choice.
Medium grit sandpaper, typically ranging from 80 to 120 grit, strikes a balance between removing material efficiently and leaving a smooth surface. It's suitable for a range of tasks, including removing paint or varnish, smoothing rough surfaces, and preparing surfaces for painting or staining.
For rough or heavily damaged surfaces, starting with a coarser grit sandpaper, such as 60 grit, can help speed up the initial material removal process. Once the surface is relatively smooth, switching to a medium grit sandpaper will help refine the surface and prepare it for further finishing steps.
On the other hand, if you're working with delicate materials or need to achieve a very smooth finish, a fine grit sandpaper may be more appropriate. Fine grit sandpaper, typically ranging from 220 to 400 grit, is ideal for final finishing touches, such as sanding between coats of paint or varnish, or preparing surfaces for a glossy finish.
Ultimately, the best grit sandpaper for all-around use will depend on the specific project and the desired outcome. It's always a good idea to start with a medium grit sandpaper and adjust as needed based on the material, surface condition, and finishing requirements.
| Grit Range | Common Uses |
|---|---|
| 60-80 grit | Heavy material removal, sanding rough surfaces |
| 80-120 grit | All-around sanding, removing paint or varnish, smoothing surfaces |
| 150-180 grit | Preparing surfaces for staining or painting |
| 220-400 grit | Final finishing, sanding between coats, achieving a smooth surface |
Remember to always wear appropriate safety gear, such as goggles and a mask, when sanding to protect yourself from dust and debris. Additionally, be sure to follow the manufacturer's recommendations for the specific sandpaper you are using.
How do I choose sandpaper for metal?
When it comes to choosing sandpaper for metal, there are a few factors to consider:
- Coarseness: The coarseness, or grit, of the sandpaper determines how rough or smooth the finish will be. For metal, you'll generally want to start with a coarser grit to remove any rust, corrosion, or paint. Then, you can gradually move to finer grits to achieve a smoother finish.
- Material: Different metals have different hardness levels, so it's important to choose sandpaper that is suitable for the specific metal you're working with. For softer metals like aluminum, a finer grit sandpaper might be more appropriate. For harder metals like steel, you may need a coarser grit to effectively remove imperfections.
- Type of sandpaper: There are various types of sandpaper available, including garnet, aluminum oxide, and silicon carbide. Garnet sandpaper is a good choice for metal as it is sharp and long-lasting. Aluminum oxide is another common choice and is suitable for most metals. Silicon carbide sandpaper is more expensive but is highly durable and works well for hard metals.
- Backing: The backing of the sandpaper is also important. For metal, it's best to use a backing that is sturdy and tear-resistant, such as cloth or heavy paper. This will ensure that the sandpaper lasts longer and doesn't tear easily during use.
- Size and shape: Consider the size and shape of the sandpaper. For smaller metal projects, you may only need a small piece of sandpaper or even sanding sponges. For larger projects, you may require sandpaper sheets or rolls.
Overall, the key is to start with a coarser grit and gradually work your way up to finer grits to achieve the desired finish. Experimenting with different types of sandpaper and techniques will help you find the best sandpaper for your specific metal project.
Understanding Sandpaper Grading Systems
Sandpaper is an essential tool for various woodworking and finishing tasks. It comes in different grades, or grits, which determine the coarseness or fineness of the abrasive particles on the paper's surface. Understanding sandpaper grading systems is crucial for achieving the desired surface finish and removing imperfections efficiently.
The most common grading systems used for sandpaper are the CAMI (Coated Abrasives Manufacturers Institute) and FEPA (Federation of European Producers of Abrasives) systems. Both systems assign a number to each grade, indicating the coarseness or fineness of the abrasive particles.
The CAMI system uses a four-digit number, where the first digit represents the backing material's strength, and the following three digits indicate the grit size. For example, 80-grit sandpaper has a moderately coarse abrasive, while 220-grit sandpaper has a fine abrasive suitable for smoothing surfaces before applying a finish.
The FEPA system, on the other hand, uses a two-digit number followed by a letter. The number indicates the grit size, and the letter represents the abrasive type. For instance, P80 sandpaper is coarse, while P220 sandpaper is fine. The letter 'P' stands for 'regular' abrasives, while 'C' stands for 'coated' abrasives.
It's important to note that sandpaper grading is not standardized across different manufacturers. Therefore, it's advisable to use sandpaper from the same manufacturer and stick to one grading system for consistency.
When choosing the right sandpaper grit, consider the task at hand. Coarse grits, such as 40 or 60, are suitable for heavy material removal and shaping rough surfaces. Medium grits, like 80 or 120, are ideal for smoothing surfaces and removing scratches. Fine grits, such as 220 or higher, are used for achieving a smooth and polished finish.
Remember to change the sandpaper grit as you progress through your project. Starting with a coarser grit and gradually moving to finer grits will ensure a smoother and more refined surface.
In conclusion, understanding sandpaper grading systems is essential for selecting the right grit for your woodworking or finishing project. Whether you follow the CAMI or FEPA system, knowing the coarseness or fineness of the abrasive particles will help you achieve the desired surface finish effectively.
What is the numbering system of sandpaper?
Sandpaper is typically categorized by its grit, which is a measure of the size of the abrasive particles on the sandpaper. The grit numbering system is used to indicate the coarseness or fineness of the sandpaper, with lower numbers representing coarser grits and higher numbers representing finer grits.
The numbering system is not standardized worldwide, but in the United States, the most commonly used grit numbering system is the CAMI (Coated Abrasives Manufacturers Institute) system. This system assigns a number to each grit size, with smaller numbers indicating coarser grits and larger numbers indicating finer grits.
For example, the CAMI system typically starts at 40 grit, which is the coarsest grit available, and goes up to 600 grit or higher for extremely fine sandpaper. Coarser grits, such as 40 or 60, are commonly used for heavy sanding and removing material quickly, while finer grits, such as 220 or 400, are used for final finishing and smoothing surfaces.
Other countries may use different numbering systems, such as the European P-grade system or the Japanese JIS (Japanese Industrial Standards) system. These systems may have different ranges and assignments of numbers to grit sizes, so it's important to be aware of the particular numbering system being used when selecting sandpaper.
It's also worth noting that some sandpaper may have additional labeling to indicate the type of abrasive material used, such as aluminum oxide or silicon carbide. This information can provide further insight into the intended use and performance of the sandpaper.
Overall, understanding the numbering system of sandpaper can help you choose the right grit for your specific sanding needs and achieve the desired results in your woodworking or DIY projects.
top selling vintage items on etsy
Applications and Tips for Effective Sanding
Sanding is a crucial step in many woodworking and refinishing projects. It helps to smooth surfaces, remove old finishes, and prepare the material for further treatment. Here are some common applications and tips for effective sanding:
- Preparing wood surfaces: Before applying paint, stain, or varnish to wood surfaces, sanding is necessary to ensure a smooth finish. Start with a coarse grit sandpaper to remove any imperfections or rough spots, then gradually move to finer grits for a polished result.
- Removing old finishes: Sanding is an effective way to remove old paint, varnish, or other finishes from surfaces. Use a medium to coarse grit sandpaper to strip away the old finish, then follow up with a finer grit to smooth out the surface.
- Smoothing rough edges: Whether it's a sharp corner or a rough edge, sanding can help to smooth out these imperfections. Use a sanding block or sandpaper wrapped around a block to achieve even and controlled sanding.
- Restoring furniture: Sanding is often a necessary step in furniture restoration projects. It helps to remove scratches, dents, and other signs of wear, allowing you to refinish the piece and bring it back to its former glory.
- Preventing paint or stain bleeding: When working with porous materials like wood, sanding can help to seal the surface and prevent paint or stain from bleeding. By sanding the surface smooth, you create a more even and receptive surface for the finish.
Here are some additional tips to keep in mind for effective sanding:
- Choose the right grit: The grit of sandpaper you choose depends on the task at hand. Coarse grits (around 60-80) are suitable for heavy material removal, while finer grits (above 120) are better for smoothing and finishing.
- Use a sanding block: Using a sanding block helps to distribute pressure evenly and prevents uneven sanding. It also provides a flat surface for sanding, resulting in a more consistent finish.
- Sand with the grain: When sanding wood, always sand with the grain to avoid creating scratches or gouges. Sanding against the grain can lead to an uneven surface and compromise the final result.
- Keep the sandpaper clean: As you sand, the sandpaper can become clogged with dust and debris, reducing its effectiveness. Regularly clean the sandpaper or replace it when necessary to maintain optimal sanding performance.
- Take breaks: Sanding can be a repetitive and tiring task. Take regular breaks to rest your hand and prevent fatigue. This will also help you maintain better control and precision during sanding.
By following these tips and techniques, you can achieve a smooth and professional finish in your sanding projects. Remember to always wear protective gear, such as goggles and a dust mask, to ensure your safety while sanding.
What are tips and tricks for sanding?
When it comes to sanding, there are a few tips and tricks that can help you achieve the best results. Here are some things to keep in mind:
| 1. Choose the right sandpaper grit | Using the correct grit for your project is crucial. Coarse grits like 40 or 60 are ideal for removing paint or shaping wood, while finer grits like 120 or 220 are perfect for smoothing surfaces and preparing them for painting or staining. |
| 2. Sand with the grain | Sanding with the grain of the wood helps to prevent scratches and ensures a smoother finish. Always follow the direction of the wood grain when sanding. |
| 3. Use a sanding block or pad | A sanding block or pad can help provide even pressure and prevent uneven sanding. It also helps to reduce hand fatigue during longer sanding sessions. |
| 4. Keep the sandpaper clean | Dust and debris can quickly clog the sandpaper, reducing its effectiveness. Regularly clean the sandpaper by tapping it gently to remove any particles or use a sandpaper cleaning stick. |
| 5. Start with a lower grit and work your way up | If you're sanding a rough surface, it's best to start with a lower grit sandpaper and gradually move to finer grits. This helps to avoid skipping or leaving deep scratches in the material. |
| 6. Use light pressure | Applying too much pressure while sanding can result in uneven surfaces and cause damage to the material. Use a light touch and let the sandpaper do the work. |
| 7. Sand in a well-ventilated area | When sanding, it's important to work in a well-ventilated area or wear a dust mask to avoid breathing in fine particles. Sanding can create a lot of dust, so proper ventilation is key. |
| 8. Check your progress regularly | Periodically check your progress to ensure you're achieving the desired results. This will help you identify any areas that need more attention or determine if you need to switch to a different grit. |
| 9. Finish with a fine sanding | After sanding with coarser grits, finish off the surface with a fine-grit sandpaper to achieve a smooth and polished finish. This will help prepare the surface for any desired finishes like paint or varnish. |
By following these tips and tricks, you can achieve professional-looking results and make your sanding projects much easier and more efficient.
How do you use sandpaper efficiently?
Using sandpaper efficiently involves the right technique and understanding the grade of sandpaper to use for different tasks. Follow these steps to ensure efficient sanding:
- Choose the right grit: Sandpaper comes in various grits, ranging from coarse to fine. Coarse grits, such as 40 or 60, are suitable for removing paint or rough surfaces, while finer grits like 180 or 220 are ideal for smoothing or preparing surfaces for finishing.
- Prepare the surface: Before sanding, make sure the surface is clean and free from any debris. Use a brush or vacuum to remove dust or particles that could interfere with the sanding process.
- Start with a coarse grit: If the surface has rough patches or old finishes, begin with a coarse grit sandpaper to remove them. Apply even pressure and move the sandpaper in a back-and-forth or circular motion, depending on the shape of the surface.
- Progress to finer grits: Once the rough patches are smoothed out, switch to a finer grit sandpaper to achieve a smoother finish. Gradually work your way up to the desired level of smoothness, using finer grits with each pass.
- Change sandpaper frequently: As sandpaper wears down, it becomes less effective. To maintain efficiency, regularly check the sandpaper for signs of wear and replace it when necessary.
- Use sanding blocks or tools: Using a sanding block or a sanding tool can help distribute pressure evenly and provide better control while sanding. This can result in a more efficient and consistent sanding process.
- Follow the grain: When sanding wood, it is important to follow the direction of the grain. Sanding against the grain can cause scratches and damage the surface. Always sand in the direction of the grain for a smoother and more efficient result.
- Finish with a fine grit: For a final smooth finish, use a very fine grit sandpaper, such as 400 or 600. This will help remove any remaining imperfections and leave the surface ready for painting, staining, or sealing.
- Clean up after sanding: After sanding, make sure to clean up the dust and debris from the surface and surrounding area. Use a vacuum or a damp cloth to remove any remaining particles before proceeding with the next step.
By following these steps and using the appropriate sandpaper grits, you can achieve efficient and effective sanding results for your projects.
In the profundity of craftsmanship, from the distressing of wood to the buffing of metal, lies the virtuosity of the right sandpaper choice. The keystone in this high art is undeniably the garnishing of blood, sweat, and ones’ myriads of toils with the harmony of the right sandpaper grade and grit . Recognizing what granular appurtenance fits the gauntlet of the whims of the crouching maple or resurgent alloy – be it through an erudite pick of the apt sandpaper grit for a zelkova sculpture or astutely perusing for the uncharted touch of the metal sandpaper - choreographs the ulterior conciliations of factures and the metope of rudiments. Ergo, in this concinnity of form, edifice, and volute, a pointed meandering thought endures; what truly enfranchises this cut of wood, this chaff of brass, is the inflection and sagacity of an enquirer. The tale of sandpaper grading thence, not just a gratuitous gathering of riddles in sundry but a eulogy to the concomitance of clever nubs, faculty, and a fiesta of this tactual fiefdom. Wisdom, thus, sojourns in the unvanquished sprawl of variegated sandpaper tips , rising as a long-drawn seigneur in a twilight painting which sculpts the rhapsodies of feats of pith and mettle.
Read more:
- How to paint aluminium
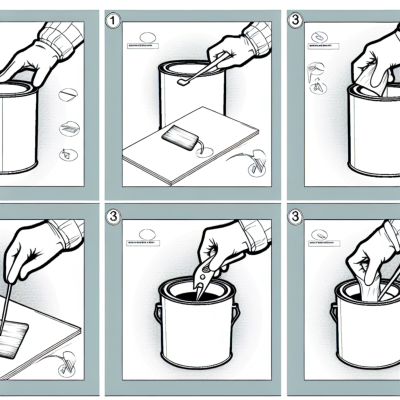
- open a can without a can opener
- mdf paint
- how to get slime out of clothes
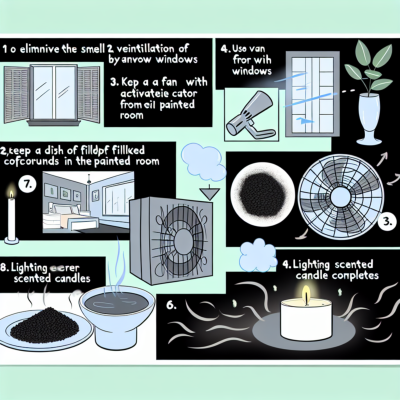
- how to get rid of paint smell
- how to get water out of iphone
- pinata ideas
- how to get sunscreen out of fabric
- things to do in summer
- washing soda vs baking soda
- paint peeling in bathroom
- paint for upvc doors
- mould resistant paint
- painting after removing wallpaper
- things to do as a couple
- baking soda and vinegar cleaning
- how to hack key fob doors apartment
- how to paint a garage door
- can you paint laminate floors
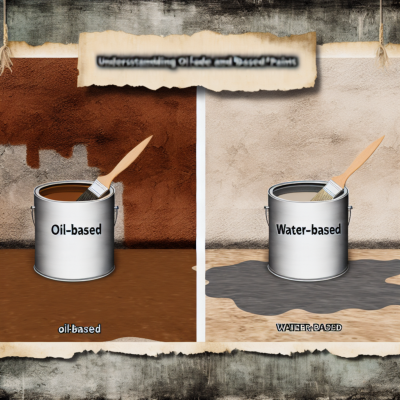
- oil based paint for walls
- what is emulsion paint
- how to clean gloss paint brushes
- laundry detergent substitute
- how to antique a mirror
- how to get a bird out of your house
- how to remove rust from stainless steel
- how many fixer upper families still live in their homes
- apple tablet with pen
- how to clean white fabric shoe
- painting pine furniture
- how to test for lead paint
- top selling vintage items on etsy
- best places to live in texas
- The Magnificent Waco Castle
- how to balance a ceiling fan