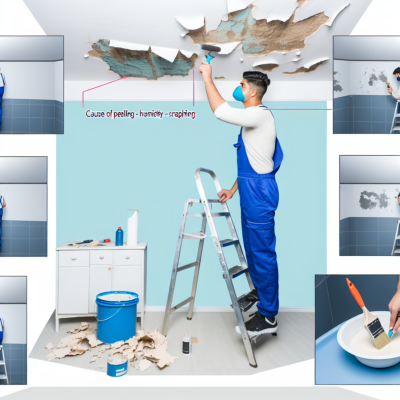
Peeling paint in the bathroom can be an unsightly and frustrating issue to deal with. With constant exposure to moisture from showers and baths, bathroom paint is susceptible to bubbling, cracking, and losing adhesion over time. This can lead to areas of the bathroom ceiling peeling , revealing the bare surface underneath. Contributing factors include steam, inadequate ventilation, leaks, and improper surface preparation. Successfully addressing peeling bathroom ceiling paint requires identifying and fixing the underlying cause of the moisture, properly preparing the surface, using high quality primer and paint formulated for bathrooms, maintaining cleanliness and ventilation, and staying vigilant through regular inspections and touch-ups. With some diligent preventive care and prompt attention when needed, it is possible to keep your bathroom ceiling paint intact for years before needing a repaint.
Painting a bathroom ceiling can be a challenging task, especially when it comes to maintaining its appearance over time. The bathroom is a unique environment with high humidity levels and constant exposure to moisture, which can lead to paint problems such as peeling, cracking, and discoloration. These issues not only affect the aesthetic appeal of your bathroom but can also indicate underlying problems that need to be addressed.
Peeling paint is a common issue in bathrooms due to the high levels of moisture present. When moisture seeps into the ceiling, it can cause the paint to lose adhesion and peel away from the surface. This can be caused by inadequate ventilation, water leaks, or improper paint application. Addressing the source of moisture and using a high-quality moisture-resistant paint can help prevent peeling and ensure a longer-lasting finish.
Cracking paint is another problem that may occur on bathroom ceilings. Temperature fluctuations and moisture can cause the paint to expand and contract, leading to cracking. Additionally, using a low-quality paint or applying too many layers can also contribute to cracking. To resolve this issue, it is important to choose a flexible paint specifically designed for bathrooms and apply it in thin, even coats.
Discoloration is a common issue in bathrooms with poor ventilation. The combination of moisture and lack of airflow can create the perfect environment for mold and mildew growth, which can cause unsightly stains on the ceiling. To prevent discoloration, proper ventilation is essential. Installing an exhaust fan or opening windows during and after showering can help remove excess moisture from the bathroom. Additionally, using mold and mildew-resistant paint can provide an extra layer of protection against discoloration.
Resolving bathroom ceiling paint issues requires a combination of proper preparation, quality materials, and regular maintenance. By addressing the underlying causes and taking preventive measures, you can ensure a beautiful and long-lasting paint finish in your bathroom.
1010 angel number
Identifying Causes of Peeling and Cracking Paint in Bathrooms
Paint peeling and cracking in bathrooms can be a frustrating problem to deal with. Not only does it affect the aesthetics of the space, but it can also be a sign of underlying issues that need to be addressed. By identifying the causes of peeling and cracking paint in bathrooms, you can take the necessary steps to fix the problem and prevent it from happening again in the future.
One common cause of peeling and cracking paint in bathrooms is moisture. Bathrooms are typically high-moisture environments, with steam from showers and baths creating a humid atmosphere. This moisture can penetrate the paint and cause it to peel or crack over time. Inadequate ventilation can exacerbate the problem, as it prevents the moisture from escaping and allows it to linger in the space.
Another possible cause of paint issues in bathrooms is poor surface preparation. If the surface was not properly cleaned, sanded, or primed before painting, the paint may not adhere properly and can start to peel or crack. It's important to ensure that the surface is clean and dry before applying paint, and to use a high-quality primer or sealer to create a strong bond between the paint and the surface.
Additionally, using the wrong type of paint in a bathroom can also lead to peeling and cracking. Bathrooms are prone to temperature fluctuations and moisture, so it's important to use a paint that is specifically designed for high-moisture areas. Look for paints labeled as 'bathroom' or 'kitchen and bath' paints, as these are formulated to withstand the conditions often found in bathrooms.
In some cases, peeling and cracking paint can be a sign of an underlying issue, such as a leak or water damage. If the paint issues are localized in a certain area, it's worth investigating further to see if there are any signs of water damage. Addressing the underlying issue is crucial in order to prevent further damage and ensure a long-lasting paint job.
In conclusion, identifying the causes of peeling and cracking paint in bathrooms is essential for finding a solution to the problem. Whether it's due to moisture, poor surface preparation, using the wrong type of paint, or an underlying issue, taking the necessary steps to fix the problem will help maintain the integrity and appearance of your bathroom.
What causes paint to crack and peel?
There are several factors that can cause paint to crack and peel on bathroom ceilings. Understanding these causes can help you prevent or address the issue:
- Moisture: Excessive moisture in the bathroom can cause paint to crack and peel over time. This can happen due to high humidity levels, inadequate ventilation, or water leaks. When moisture gets trapped between the paint and the ceiling, it can cause the paint to lose adhesion and peel away.
- Old paint: If the existing paint on the bathroom ceiling is old or of low quality, it may be more prone to cracking and peeling. Over time, the paint can deteriorate and lose its elasticity, making it more susceptible to cracking and peeling.
- Inadequate surface preparation: Proper surface preparation is crucial for ensuring paint adhesion. If the bathroom ceiling was not properly cleaned, sanded, or primed before painting, it can result in poor adhesion and eventual cracking and peeling.
- Temperature fluctuations: Extreme temperature fluctuations in the bathroom can cause the paint to expand and contract, leading to cracking and peeling. This is particularly common in bathrooms that have inadequate insulation or are exposed to frequent temperature changes.
- Incorrect paint application: Applying paint incorrectly can also contribute to cracking and peeling. This includes applying paint that is too thick, using the wrong type of paint for the bathroom environment, or not allowing sufficient drying time between coats.
- Structural issues: In some cases, cracking and peeling paint on the bathroom ceiling could be a symptom of underlying structural issues, such as water damage or ceiling movement. It's important to address these issues promptly to prevent further damage and ensure the longevity of the paint.
By addressing these potential causes and taking necessary precautions, you can help prolong the life of the paint on your bathroom ceiling and prevent issues like cracking and peeling.
Does peeling paint in bathroom mean mold?
When you notice peeling paint in your bathroom, it can be a sign of moisture-related issues. While peeling paint itself does not necessarily indicate the presence of mold, it can be a precursor to mold growth if the underlying issue is not addressed.
In bathrooms, peeling paint is often caused by excessive humidity and moisture. When moisture seeps into the walls or ceiling, it can cause the paint to lose adhesion and peel off. This can create an ideal environment for mold to grow.
If you notice peeling paint in your bathroom, it is essential to identify and address the source of the moisture. Common culprits include leaky pipes, inadequate ventilation, or water seepage from the shower or bathtub. By fixing these issues, you can prevent further peeling and potentially stop mold growth.
However, it is important to note that not all peeling paint indicates the presence of mold. Sometimes, peeling paint can be caused by other factors such as improper surface preparation or the use of low-quality paint. To determine if mold is present, you can inspect the affected areas for visible signs of mold, such as discoloration or a musty odor.
If you suspect the presence of mold in your bathroom, it is recommended to consult a professional for proper mold testing and remediation. They can assess the situation and take appropriate measures to remove any mold and prevent its recurrence.
| Signs of Mold in the Bathroom |
|---|
| Visible mold growth |
| Musty odor |
| Discoloration on walls or ceiling |
| Peeling or bubbling paint |
| Excessive moisture or condensation |
In conclusion, peeling paint in the bathroom can be an indication of moisture-related issues that may lead to mold growth if not addressed promptly. It is important to identify and fix the source of the moisture to prevent further damage and potential health risks associated with mold. If you suspect mold, it is best to consult a professional for proper assessment and remediation.
Does moisture cause paint to crack?
Yes, moisture can cause paint to crack on bathroom ceilings. When moisture penetrates the surface of the ceiling, it can weaken the adhesion between the paint and the ceiling material. This can lead to the paint cracking and peeling over time.
In bathrooms, high levels of humidity and condensation are common, especially during hot showers or baths. If the bathroom is poorly ventilated, the moisture can become trapped in the room, increasing the chances of paint damage.
Additionally, if there are existing water leaks or plumbing issues in the bathroom, this can further contribute to the moisture problem and increase the likelihood of paint cracking.
To prevent paint from cracking due to moisture, it is essential to address any underlying moisture issues in the bathroom. This can include improving ventilation by installing exhaust fans or opening windows, fixing any leaks or plumbing problems, and using moisture-resistant paints specifically designed for high humidity areas.
Regular maintenance and inspection of the bathroom ceiling can also help identify and address any moisture-related problems before they cause significant paint damage.
Step-by-Step Guide to Repairing Bathroom Ceiling Paint

If you're experiencing issues with your bathroom ceiling paint, such as peeling or discoloration, it's important to address them as soon as possible. Here is a step-by-step guide to repairing bathroom ceiling paint:
- Start by removing any loose or peeling paint from the ceiling. Use a putty knife or scraper to gently scrape away the damaged paint. Be careful not to damage the underlying surface.
- Once the loose paint has been removed, sand the ceiling to create a smooth surface. Use a fine-grit sandpaper and sand in a circular motion. Wipe away any dust with a damp cloth.
- Next, apply a coat of primer to the ceiling. This will help the new paint adhere better and provide a more even finish. Use a paintbrush or roller to apply the primer, making sure to cover the entire surface.
- Allow the primer to dry completely before applying the new paint. Check the manufacturer's instructions for drying times, as they may vary.
- Choose a high-quality paint specifically designed for use in bathrooms. This type of paint is often moisture-resistant and mold-resistant, which is important in a bathroom environment.
- Apply the new paint to the ceiling, starting at one corner and working your way across. Use a paintbrush or roller, depending on your preference and the size of the area. Make sure to apply an even coat of paint.
- Allow the first coat of paint to dry completely before applying a second coat, if necessary. This will help ensure a more durable finish.
- Once the paint has dried, inspect the ceiling for any remaining issues. Touch up any areas that may need additional paint or attention.
- Finally, clean up your painting supplies and properly dispose of any waste materials. Enjoy your newly repaired bathroom ceiling!
By following these steps, you can successfully repair bathroom ceiling paint issues and create a fresh, clean look in your bathroom. Remember to take the necessary precautions, such as wearing protective clothing and using proper ventilation, when working with paint and other chemicals.
How do you repair bathroom ceiling paint?
If you notice that the paint on your bathroom ceiling is peeling, cracking, or showing signs of water damage, it's important to address the issue as soon as possible. Here are some steps you can take to repair bathroom ceiling paint:
- Prepare the area: Before you start any repairs, make sure to protect the surrounding area by covering the floor and any fixtures with drop cloths or plastic sheets.
- Remove the damaged paint: Use a scraper or sandpaper to remove any loose or flaking paint from the ceiling. Be careful not to damage the underlying surface.
- Repair any water damage: If there is any water damage on the ceiling, it's important to address the source of the problem before repainting. Fix any leaks or plumbing issues to prevent further damage.
- Fill in cracks and holes: Use a putty knife to fill in any cracks or holes in the ceiling with spackling compound or joint compound. Smooth out the surface and let it dry completely.
- Sand the repaired areas: Once the compound is dry, use sandpaper to smooth out the repaired areas. This will create a smooth and even surface for the new paint.
- Prime the ceiling: Apply a coat of primer to the entire ceiling to ensure good adhesion and to hide any repairs. Use a roller or brush to evenly distribute the primer.
- Paint the ceiling: Finally, apply a fresh coat of paint to the ceiling using a roller or brush. Make sure to choose a paint that is specifically designed for bathrooms, as it will be more resistant to moisture and mildew.
- Allow the paint to dry: Follow the manufacturer's instructions for drying time, and make sure to allow the paint to fully cure before exposing it to moisture or steam.
By following these steps, you can repair bathroom ceiling paint and restore the appearance of your bathroom. Remember to always take proper safety precautions, such as wearing goggles and a mask, when working with paint and other chemicals.
What is the best way to paint a bathroom ceiling?
Painting a bathroom ceiling can be a tricky task due to factors such as moisture, steam, and limited ventilation. However, with the right techniques and materials, you can achieve a durable and long-lasting finish. Here are some steps to follow for the best way to paint a bathroom ceiling:
| Step 1: | Prepare the surface |
| Step 2: | Choose the right paint |
| Step 3: | Use a high-quality primer |
| Step 4: | Apply the paint |
| Step 5: | Allow sufficient drying time |
| Step 6: | Apply a second coat (if necessary) |
Before starting the painting process, make sure to prepare the surface properly. Clean the ceiling to remove any dirt, dust, or mildew. Repair any cracks or imperfections with spackling compound and sand the surface smooth.
When choosing paint for a bathroom ceiling, opt for a high-quality, moisture-resistant paint that is specifically designed for bathrooms. These paints are formulated to withstand the moisture and steam that are commonly found in bathrooms.
Using a high-quality primer is essential for painting a bathroom ceiling. A primer will create a smooth and even surface, help the paint adhere better, and prevent any stains or discoloration from bleeding through.
Apply the paint using a roller or a paintbrush, starting from the edges and working your way towards the center. Make sure to apply an even coat and avoid excessive dripping. If necessary, use painter's tape to protect the walls and fixtures from accidental paint splatters.
Allow the paint to dry completely before using the bathroom or exposing the ceiling to steam or moisture. This will ensure that the paint cures properly and prevents any premature peeling or discoloration.
If needed, apply a second coat of paint to achieve a more durable and flawless finish. Make sure to follow the manufacturer's instructions regarding the drying time between coats.
By following these steps and using the right materials, you can achieve a beautifully painted bathroom ceiling that will withstand the test of time and moisture.
Preventive Measures to Avoid Paint Peeling in Bathrooms
Paint peeling in bathrooms can be a frustrating issue, but there are several preventive measures you can take to avoid this problem. By following these tips, you can ensure that your bathroom ceiling paint remains intact and free from peeling.
- Proper ventilation: One of the main causes of paint peeling in bathrooms is excessive moisture. Ensure that your bathroom is properly ventilated to allow moisture to escape. Use exhaust fans or open windows during and after showers to reduce humidity levels.
- Use moisture-resistant paint: When painting your bathroom ceiling, choose a high-quality moisture-resistant paint. These paints are specifically designed to withstand the humid conditions of bathrooms and are less likely to peel or crack.
- Prevent water leaks: Regularly check your bathroom for any leaks or water damage. Fix any leaks promptly to prevent water from seeping into the ceiling and causing paint peeling. Pay special attention to areas around sinks, showers, and toilets.
- Avoid excessive steam: Excessive steam can contribute to paint peeling. To minimize steam, consider using a shower curtain or door to contain the steam within the shower area. Also, try to keep the bathroom door closed during and after showers to prevent steam from spreading to other areas of the bathroom.
- Proper cleaning: Avoid using harsh cleaning agents or abrasive materials on your bathroom ceiling. These can damage the paint and make it more prone to peeling. Instead, use mild cleaners and soft cloths to gently clean the surface.
By implementing these preventive measures, you can significantly reduce the chances of paint peeling in your bathroom. Taking proactive steps to maintain the integrity of your bathroom ceiling paint will ensure a long-lasting and visually appealing finish.
How do I stop paint peeling in bathroom?
If you are experiencing paint peeling in your bathroom, it can be frustrating and unsightly. Fortunately, there are several steps you can take to prevent further peeling and maintain a beautiful, long-lasting paint job.
1. Prepare the surface: Before applying any new paint, it's important to properly prepare the surface. Remove any loose or peeling paint using a scraper or sandpaper. Clean the area thoroughly to remove any dust, dirt, or grease that may prevent the new paint from adhering properly.
2. Use the right primer: A high-quality primer is essential for preventing paint peeling in the bathroom. Choose a primer that is specifically designed for use in high-moisture areas like bathrooms. Apply the primer evenly and allow it to dry completely before applying the topcoat.
3. Choose the right paint: When selecting paint for your bathroom, opt for a high-quality, moisture-resistant paint. Look for paint that is specifically formulated for use in bathrooms or other high-moisture areas. These paints are designed to withstand the humidity and moisture that can cause paint to peel.
4. Apply multiple coats: To ensure a durable and long-lasting paint job, apply multiple coats of paint. Follow the manufacturer's instructions for drying times between coats. Applying multiple thin coats will provide better coverage and help prevent paint peeling.
5. Ventilate the bathroom: Proper ventilation is crucial in preventing paint peeling in the bathroom. Install a ventilation fan or ensure that your existing fan is working properly. Proper ventilation will help reduce the humidity and moisture levels in the bathroom, which can cause paint to peel.
6. Fix any underlying issues: If you continue to experience paint peeling despite taking preventative measures, there may be underlying issues that need to be addressed. Check for any leaks or water damage that may be causing excess moisture in the bathroom. Repair any leaks and address any water damage before repainting.
| Summary: |
|---|
| To stop paint peeling in the bathroom, prepare the surface, use a high-quality primer and paint, apply multiple coats, ensure proper ventilation, and address any underlying issues such as leaks or water damage. |
How do you stop paint from peeling?
Paint peeling can be a frustrating problem, especially in high-moisture areas like bathrooms. However, there are several steps you can take to prevent paint from peeling and ensure a long-lasting finish.
1. Prepare the surface: Before painting, make sure the surface is clean and dry. Remove any loose or flaking paint, and sand the area to create a smooth surface for the new paint to adhere to.
2. Use the right paint: Make sure you are using a high-quality paint that is suitable for bathroom environments. Look for paints that are specifically formulated to resist moisture and mildew.
3. Prime the surface: Apply a coat of primer before painting to create a strong bond between the surface and the paint. This will help prevent peeling and improve the longevity of the paint job.
4. Apply thin coats: Instead of applying one thick coat of paint, apply several thin coats. This allows each coat to dry properly and reduces the chances of peeling or cracking.
5. Allow proper drying time: Be patient and allow each coat of paint to dry completely before applying the next one. Rushing the drying process can lead to paint peeling and other issues.
6. Maintain proper ventilation: Proper ventilation is essential in bathrooms to reduce moisture buildup. Use exhaust fans or open windows to ensure proper air circulation, which can help prevent paint from peeling due to excessive humidity.
7. Avoid excessive moisture: Take steps to minimize moisture in your bathroom, such as using a shower curtain or door to prevent water from reaching the painted surfaces directly. Wipe off any excess moisture promptly to avoid prolonged exposure to water.
8. Address underlying issues: If your bathroom has persistent moisture problems, such as leaks or high humidity levels, it is important to address these issues before painting. Fixing the underlying problems will help prevent paint from peeling in the future.
By following these tips, you can significantly reduce the chances of paint peeling in your bathroom. Remember to properly prepare the surface, use the right paint and primer, apply thin coats, allow for proper drying time, maintain ventilation, avoid excessive moisture, and address any underlying issues. With these steps, you can enjoy a beautiful and long-lasting paint job in your bathroom.
How do you make bathroom paint safe?
When it comes to painting your bathroom, it is important to choose a paint that is safe for use in a high-moisture environment. Here are some tips on how to make bathroom paint safe:
1. Choose the right type of paint: Look for paints that are specifically designed for use in bathrooms or other high-moisture areas. These paints are often labeled as 'bathroom paint' or 'mold and mildew resistant paint.' They are formulated to withstand the humid conditions in a bathroom and resist the growth of mold and mildew.
2. Use first: Before applying the paint, make sure to use a high-quality primer. Priming the walls will create a smooth and even surface for the paint to adhere to. It will also help to prevent moisture from seeping into the walls and causing damage.
3. Ensure proper ventilation: Proper ventilation is key to preventing moisture build-up in the bathroom. Make sure your bathroom has a functioning exhaust fan or window to allow for air circulation. This will help to reduce the humidity levels in the room and prevent paint from peeling or blistering.
4. Apply multiple coats: Applying multiple coats of paint will provide an extra layer of protection against moisture. Make sure to follow the manufacturer's instructions for drying time between coats to ensure proper adhesion and durability.
5. Maintain cleanliness: Regular cleaning and maintenance of your bathroom can help to extend the life of your paint job. Wipe down walls and surfaces regularly to remove any excess moisture or mildew. Avoid using harsh cleaners that can damage the paint.
By following these tips, you can ensure that your bathroom paint is safe and will withstand the humid conditions of the space.
Tips for Choosing and Applying the Right Bathroom Ceiling Paint
When it comes to painting your bathroom ceiling, it’s important to choose the right type of paint and apply it correctly to ensure a long-lasting and durable finish. Here are some tips to help you choose and apply the right bathroom ceiling paint:
- Choose a moisture-resistant paint: Bathrooms are prone to high humidity and moisture, so it’s important to choose a paint that is specifically designed for damp environments. Look for paints labeled as moisture-resistant or bathroom paints.
- Consider a mold and mildew-resistant paint: Bathrooms are also susceptible to mold and mildew growth due to the moisture. To prevent this, consider using a paint that has mold and mildew-resistant properties. These types of paints contain additives that inhibit the growth of mold and mildew.
- Opt for a satin or semi-gloss finish: When it comes to bathroom ceilings, it’s best to choose a paint with a satin or semi-gloss finish. These finishes are more resistant to moisture and are easier to clean than flat or matte finishes.
- Prepare the surface properly: Before applying the paint, make sure to thoroughly clean the ceiling surface and remove any existing paint or peeling patches. Repair any cracks or imperfections and ensure the surface is smooth and dry before painting.
- Use first: Applying a primer before painting can help improve the adhesion of the paint and provide a more even finish. Choose a primer that is specifically formulated for bathroom ceilings.
- Apply the paint in thin, even coats: When applying the paint, it’s best to use a brush or roller and apply thin, even coats. This will help prevent drips and ensure a smooth finish. Allow each coat to dry completely before applying the next one.
- Consider using a paint with built-in ceiling stain coverage: If your bathroom ceiling has stains from water damage or other issues, consider using a paint with built-in stain coverage. These types of paints are specifically formulated to cover and hide stains.
- Follow the manufacturer’s instructions: Always read and follow the manufacturer’s instructions on the paint can for the best results. This includes information on proper application techniques, drying times, and any additional precautions or recommendations.
By following these tips, you can choose and apply the right bathroom ceiling paint to achieve a beautiful and long-lasting finish that can withstand the unique challenges of a bathroom environment.
What type of paint should be used on a bathroom ceiling?
Choosing the right type of paint for your bathroom ceiling is essential to ensure durability and prevent common issues such as peeling, flaking, and mold growth. Here are a few factors to consider when selecting the appropriate paint for your bathroom ceiling:
- Moisture resistance: Bathrooms are prone to high levels of humidity and moisture, so it is crucial to choose a paint that is specifically designed for damp environments. Look for paint labeled as 'moisture-resistant' or 'bathroom paint' to ensure it can withstand the moisture in the air.
- Mold and mildew resistance: To prevent the growth of mold and mildew on your bathroom ceiling, opt for paint that has anti-microbial properties. These paints contain additives that inhibit the growth of mold and mildew, helping to keep your bathroom clean and healthy.
- Easy to clean: Bathrooms are often exposed to splashes and stains, so it is important to choose a paint that is easy to clean. Look for paints that have a washable or scrubbable finish, as they can withstand regular cleaning without losing their color or sheen.
- Durable: Since bathroom ceilings can be prone to moisture issues and frequent cleaning, it is essential to select a paint that is durable and long-lasting. Avoid using flat or matte finishes, as they are more prone to damage and staining. Instead, opt for semi-gloss or satin finishes, as they are more resistant to moisture and can be easily cleaned.
By considering these factors and choosing the right type of paint, you can ensure that your bathroom ceiling stays looking fresh and beautiful for years to come.
Is it OK to use flat paint on bathroom ceiling?
When it comes to painting a bathroom ceiling, it is generally not recommended to use flat paint. Flat paint has a matte finish and is more porous compared to other types of paint finishes. This means that it can absorb moisture and stains more easily, which can be problematic in a bathroom where humidity levels are often high.
A bathroom ceiling is particularly susceptible to moisture and condensation due to its proximity to the shower or bath. This moisture can lead to mold and mildew growth if not properly managed. Using a flat paint on the ceiling can exacerbate these issues as it can absorb the moisture, providing an ideal environment for mold and mildew to thrive.
Instead, it is recommended to use a paint finish that is specifically designed for bathrooms, such as a semi-gloss or satin finish. These finishes have a higher level of sheen and are more resistant to moisture and stains. They also make it easier to clean the ceiling, as the surface is less porous.
In addition to using an appropriate paint finish, it is important to properly prepare the bathroom ceiling before painting. This includes cleaning any existing mold or mildew, repairing any water damage, and ensuring the surface is clean and dry. Applying a primer before painting can also help to improve the adhesion and durability of the paint.
Overall, while it may be tempting to use flat paint on a bathroom ceiling for its matte appearance, it is not recommended due to its susceptibility to moisture and stains. Using a paint finish specifically designed for bathrooms, along with proper preparation and maintenance, can help to ensure a long-lasting and visually appealing ceiling in your bathroom.
Should bathroom ceiling paint be flat or satin?
When it comes to painting a bathroom ceiling, one of the most important decisions you'll have to make is choosing the right type of paint finish. While there are several options available, two of the most popular choices for bathroom ceilings are flat and satin finishes.
A flat finish is often recommended for bathroom ceilings because it helps to hide imperfections and provides a smooth, matte appearance. This type of paint finish is also less reflective, which can help to reduce glare and create a more relaxing atmosphere in the bathroom.
On the other hand, a satin finish paint offers a subtle sheen that can add a touch of elegance to the bathroom ceiling. Satin finishes are also more durable and easier to clean than flat finishes, making them a great choice for bathrooms that experience high levels of moisture and humidity.
Ultimately, the decision between flat and satin finish paint for your bathroom ceiling will depend on your personal preferences and the specific needs of your bathroom. If you're looking for a more contemporary and elegant look, satin finish paint may be the better option. However, if you're more concerned about hiding imperfections and creating a relaxed atmosphere, flat finish paint may be the way to go.
| Flat Finish Paint | Satin Finish Paint |
|---|---|
| Hides imperfections | Offers a subtle sheen |
| Provides a smooth, matte appearance | More durable and easier to clean |
| Less reflective, reduces glare | Great for high moisture and humidity |
In conclusion, both flat and satin finish paints can be suitable for bathroom ceilings, depending on the desired look and functionality. Consider your personal preferences, the overall design of your bathroom, and the specific conditions in the space when making your decision. With the right paint finish, you can create a beautiful and functional bathroom ceiling that suits your needs and style.
In conclusion, peeling paint on bathroom ceilings is an issue that can be caused by the humid conditions and excess moisture present in bathrooms. However, with proper preparation using primers and paints designed specifically for bathroom ceilings , taking measures to maintain ventilation, controlling moisture levels, and conducting repairs when necessary, bathroom ceiling paint can remain fully adhered and crack-free. Being proactive to address minor paint bubbling in bathrooms right away can help prevent peeling and having to strip and repaint the entire ceiling. With vigilant maintenance and moisture control, unsightly peeling bathroom ceiling paint can be prevented, allowing you to enjoy a freshly painted look for your bathroom ceilings.
Read more:
- How to paint aluminium
- open a can without a can opener
- mdf paint
- how to get slime out of clothes
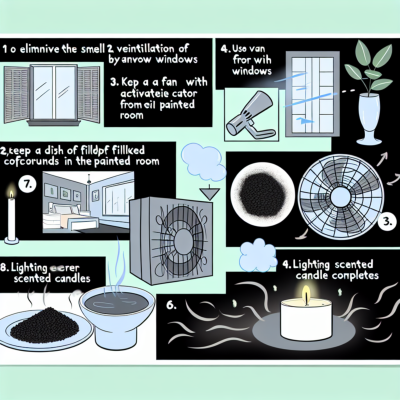
- how to get rid of paint smell
- how to get water out of iphone
- pinata ideas
- how to get sunscreen out of fabric
- things to do in summer
- washing soda vs baking soda
- paint for upvc doors
- mould resistant paint
- painting after removing wallpaper
- things to do as a couple
- sandpaper grades
- baking soda and vinegar cleaning
- how to hack key fob doors apartment
- how to paint a garage door
- can you paint laminate floors
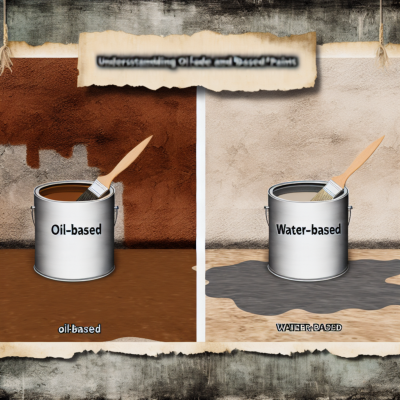
- oil based paint for walls
- what is emulsion paint
- how to clean gloss paint brushes
- laundry detergent substitute
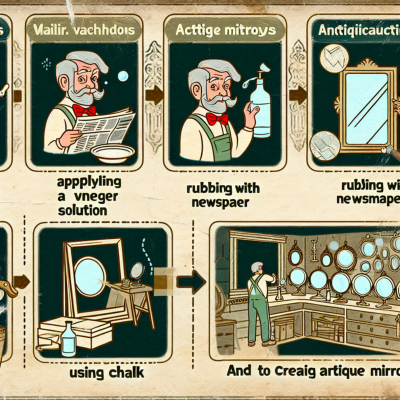
- how to antique a mirror
- how to get a bird out of your house
- how to remove rust from stainless steel
- how many fixer upper families still live in their homes
- apple tablet with pen
- how to clean white fabric shoe
- painting pine furniture
- how to test for lead paint
- top selling vintage items on etsy
- best places to live in texas
- The Magnificent Waco Castle
- how to balance a ceiling fan