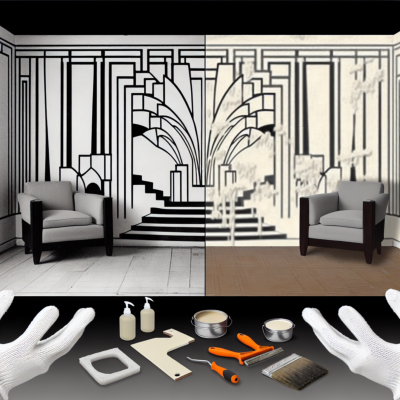
Stepping into a new era of interior design, many homeowners are faced with the challenges and rewards of painting after removing wallpaper . The experience, much like a piece of impressionist art, evolves before and after wallpaper removal , significantly transforming a house's visual dynamism. This endeavor necessitates crucial norms on how to prep walls for painting after removing wallpaper , skills that symbolize the confluence of both chance and vision. Equally invigorating is the custom of how to clean walls after removing wallpaper , which delicately foreshadows the beautiful practice of painting wall after removing wallpaper . Through our sharp symposium, we inch you ever closer to the vital practicalities of painting a wall after removing wallpaper , spotlighting the focused subject with the charisma of a genre maestro.
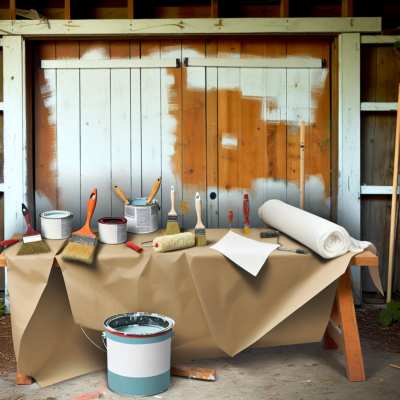
Removing wallpaper can be a tedious and time-consuming task. However, once the wallpaper is finally gone, you might be left with walls that are in less than perfect condition. Whether there are residual wallpaper adhesive, damaged drywall, or uneven surfaces, proper wall preparation is essential before painting.
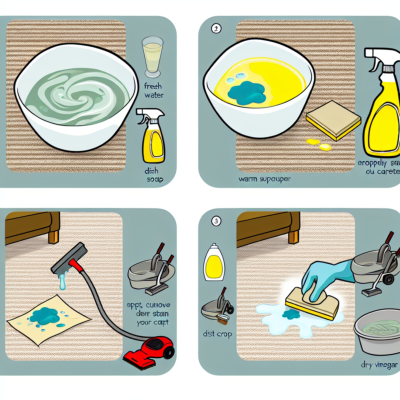
One of the first steps in preparing your walls for painting is to thoroughly clean them. Use a mixture of warm water and mild detergent to remove any dirt, grime, or grease that may have accumulated over time. Scrub the walls gently with a sponge or soft cloth, paying close attention to corners and edges.
After cleaning, inspect the walls for any damage or imperfections. Repair any cracks, holes, or dents with a suitable spackling compound or filler. Allow the compound to dry completely, and then sand it smooth with a fine-grit sandpaper. This will ensure a smooth and even surface for painting.
Once the walls are clean and repaired, it's important to prime them before painting. This will help the paint adhere better and provide a more even finish. Choose a high-quality primer that is suitable for your wall type, whether it's drywall, plaster, or another material. Apply the primer in thin, even coats, allowing each coat to dry completely before applying the next.
With proper wall preparation, your paint job will not only look better but also last longer. Take the time to clean, repair, and prime your walls before painting, and you'll be rewarded with a smooth, flawless finish that will make your room look brand new.
Steps to Clean and Prep Walls Post Wallpaper Removal
Removing wallpaper can be a time-consuming and messy process, but once it's done, you're left with a blank canvas for your new paint job. Before you dive into painting, it's important to properly clean and prep the walls to ensure a smooth and professional-looking finish. Follow these steps to get your walls ready for paint:
- Remove any remaining wallpaper residue: Even after removing the wallpaper, there may be some adhesive residue left on the walls. Use a wallpaper removal solution or a mixture of warm water and vinegar to dissolve the residue. Scrub the walls gently with a sponge or a soft-bristle brush to remove the residue completely.
- Repair any wall damage: Inspect the walls for any holes, cracks, or dents. Use spackling compound to fill in any holes or cracks, and use sandpaper to smooth out the surface. For larger holes or damage, you may need to use a patching kit or call a professional for repairs.
- Clean the walls: After removing any wallpaper residue and repairing any damage, it's important to clean the walls thoroughly. Use a mild detergent and warm water solution to wash the walls, removing any dirt, grease, or grime. Rinse the walls with clean water and allow them to dry completely before proceeding.
- Sand the walls: To ensure a smooth and even paint application, lightly sand the walls using fine-grit sandpaper. This will help to remove any remaining texture or imperfections and create a smooth surface for the paint to adhere to. Be sure to wipe away any dust or debris with a damp cloth after sanding.
- Apply a primer: Primer is an essential step in wall preparation as it helps the paint to adhere better and provides a uniform surface for the paint. Apply a coat of primer to the walls using a roller or brush, and allow it to dry completely before applying the paint.
- Inspect the walls: Once the primer is dry, inspect the walls for any remaining imperfections or areas that may need additional sanding or repair. Make any necessary touch-ups before moving on to the final step.
- Paint the walls: Finally, it's time to paint! Choose a high-quality paint in the color of your choice and apply it to the walls using a roller or brush. Follow the manufacturer's instructions for proper application and drying times. Apply multiple coats if necessary, allowing each coat to dry completely before applying the next.
By following these steps to clean and prep your walls post wallpaper removal, you'll ensure a smooth and professional-looking paint job that will transform your space.
What should I wash the walls with after removing wallpaper?
After removing wallpaper, it is important to thoroughly clean the walls before painting. This will ensure a smooth and long-lasting paint job. Here are some recommended cleaning solutions:
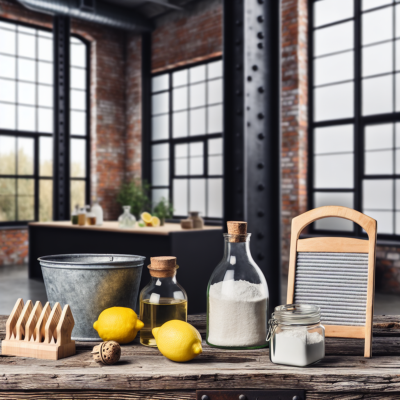
1. Warm water and dish soap: Mix warm water with a few drops of mild dish soap. Use a sponge or a soft cloth to gently scrub the walls. This solution is effective in removing any residual wallpaper paste or adhesive.
2. Vinegar and water: Create a mixture of equal parts vinegar and water. Vinegar is a natural and effective cleaner that can remove dirt, grime, and even some stains. Apply the solution to the walls using a sponge or a spray bottle, and then wipe it clean with a damp cloth.
3. TSP (trisodium phosphate): TSP is a powerful cleaner that can effectively remove grease, smoke, and other tough stains. Follow the instructions on the TSP packaging and mix it with water. Use a sponge or a scrub brush to apply the solution to the walls. Make sure to wear gloves and protective eyewear when using TSP.
4. Bleach and water: If there are any mold or mildew stains on the walls, a mixture of bleach and water can be used. Mix one part bleach with three parts water, and apply it to the affected areas using a sponge or a spray bottle. Leave it on for a few minutes, and then rinse it off with clean water.
Note: Before using any cleaning solution, it is important to test it on a small, inconspicuous area of the wall to ensure that it does not cause any damage or discoloration.
Once the walls have been cleaned, make sure to rinse them thoroughly with clean water to remove any residue from the cleaning solutions. Allow the walls to dry completely before proceeding with any painting or repairs.
How do you prepare walls for wallpaper after removing wallpaper?
After removing wallpaper, it is important to properly prepare the walls before applying new wallpaper. This will ensure a smooth and long-lasting finish. Here are the steps to prepare walls for wallpaper after removing wallpaper:
- Remove any remaining wallpaper adhesive: After removing the wallpaper, there may be adhesive residue left on the walls. Use a wallpaper adhesive remover and a scraper to gently remove any remaining adhesive. Be careful not to damage the wall surface.
- Wash the walls: Once the adhesive residue has been removed, wash the walls with a mild detergent and warm water. This will help remove any dirt, grease, or stains that may be on the walls. Rinse the walls thoroughly and allow them to dry completely before moving on to the next step.
- Repair any damage: Inspect the walls for any holes, cracks, or other damage. Use a spackling compound to fill in any holes or cracks, and a putty knife to smooth it out. Sand the repaired areas until they are smooth and level with the rest of the wall surface.
- Prime the walls: Before applying new wallpaper, it is recommended to prime the walls. This will create a smooth and even surface for the wallpaper to adhere to. Use a high-quality primer and apply it to the walls with a roller or brush. Allow the primer to dry completely before proceeding.
- Measure and cut the wallpaper: Once the walls are properly prepared, you can measure and cut the wallpaper according to the dimensions of the walls. Be sure to leave a little extra for trimming and matching patterns if necessary.
- Apply the wallpaper: Follow the manufacturer's instructions for applying the wallpaper. Use a wallpaper paste or adhesive and a wallpaper brush or roller to apply the wallpaper to the walls. Smooth out any air bubbles or wrinkles as you go.
- Trim and finish: Once the wallpaper is applied, use a wallpaper trimmer or a sharp utility knife to trim any excess wallpaper from the edges. Be careful not to damage the walls. Finally, use a damp sponge to wipe away any excess adhesive and clean the wallpaper surface.
By following these steps, you can effectively prepare your walls for new wallpaper after removing the old wallpaper. This will ensure a professional and flawless finish that will enhance the appearance of your space.
Do I need to prime walls after removing wallpaper?
Yes, it is highly recommended to prime walls after removing wallpaper. Priming the walls is an essential step in the wall preparation process before painting. There are several reasons why priming is necessary.
1. Seal the surface: Priming helps to seal the surface of the walls, creating a smooth and uniform base for the paint. It helps to prevent the paint from being absorbed unevenly by the wall, which can result in patchy or blotchy appearance.
2. Cover imperfections: Priming helps to cover any imperfections or damage on the wall, such as small holes, cracks, or uneven texture. It provides a consistent surface for the paint to adhere to and helps to create a flawless finish.
3. Enhance paint adhesion: Priming improves the adhesion of the paint to the wall surface, ensuring that the paint adheres properly and does not peel or flake off over time. It helps the paint to bond tightly to the wall, resulting in a long-lasting and durable finish.
4. Block stains: Priming also helps to block any stains or discoloration on the wall, such as water stains or ink marks. It prevents these stains from bleeding through the paint and affecting the final appearance of the painted wall.
Overall, priming the walls after removing wallpaper is an important step to ensure a smooth and professional-looking paint job. It helps to create a solid foundation for the paint and improves its overall performance and longevity. So, don't skip the priming step!
Techniques for Repairing and Smoothing Walls Before Painting

Before painting your walls after wallpaper removal, it's important to repair any damage and ensure a smooth surface. Here are some techniques to help you prepare your walls for painting:
1. Patching Holes:
If there are any holes or cracks in the walls, they should be patched and repaired. Use a putty knife to apply a patching compound or spackling paste to fill in the holes. Smooth it out and let it dry completely before sanding the area to create a level surface.
2. Sanding Rough Areas:
After removing wallpaper, you may find rough areas or adhesive residue on the walls. To smooth these out, use sandpaper or a sanding block to gently sand the surface. Be careful not to apply too much pressure, as it may damage the wall. Wipe away any dust or debris with a damp cloth after sanding.
3. Skim Coating:
If your walls have a lot of imperfections, such as uneven texture or small dents, skim coating can help create a smooth surface. Mix a thin layer of joint compound with water until it has a consistency similar to pancake batter. Apply the mixture to the walls using a trowel, and then smooth it out with a wide putty knife. Allow it to dry completely before sanding and repeating the process if necessary.
4. Removing Loose Paint:
paint for upvc doors
If there is any loose or peeling paint on the walls, it should be removed before painting. Use a paint scraper or putty knife to gently scrape away the loose paint. Afterward, sand the area to create a smooth surface for painting.
5. Cleaning the Walls:
Before painting, it's important to clean the walls to remove any dust, dirt, or grease. Use a mild detergent mixed with water and a sponge or cloth to scrub the walls. Rinse with clean water and allow the walls to dry completely before painting.
By following these techniques, you can ensure that your walls are repaired and smooth before painting, resulting in a professional-looking finish.
How do you repair a damaged wall before painting?
Before painting a damaged wall, it is important to properly repair and prepare the surface. Here are some steps to follow:
1. Assess the damage: Start by assessing the extent of the damage on the wall. Look for cracks, holes, or any other imperfections that need to be addressed before painting. This will help you determine the type of repair needed. |
2. Fill cracks and holes: For small cracks and holes, use a spackling compound or a patching plaster to fill them in. Apply the compound with a putty knife, making sure to smooth it out and level it with the surrounding wall. Allow it to dry completely before moving on to the next step. |
3. Repair larger holes: If the wall has larger holes or damage, you may need to use a patching kit. Cut out a piece of drywall or use a mesh patch and apply it over the hole. Secure it in place with joint compound, making sure it is smooth and level with the wall. Allow it to dry completely before proceeding. |
4. Sand the repaired areas: Once the patched areas are dry, use sandpaper to smooth them out. Sand in a circular motion until the repaired areas blend seamlessly with the rest of the wall. This will ensure a smooth and even surface for painting. |
5. Clean the wall: Before painting, it is important to clean the wall to remove any dust, dirt, or grease. Use a mild detergent and water to wash the entire wall, and then rinse it thoroughly. Allow it to dry completely before applying any paint. |
6. Prime the wall: Before painting, it is recommended to apply a primer to the repaired areas and the entire wall. Primer helps the paint adhere better and provides a uniform surface for the paint. Follow the manufacturer's instructions for applying the primer and allow it to dry before painting. |
7. Paint the wall: Once the primer is dry, it is time to paint the wall. Choose a high-quality paint that is suitable for the surface and the desired finish. Use a roller or a brush to apply the paint evenly, working in small sections. Allow the first coat to dry before applying a second coat if necessary. |
By following these steps, you can effectively repair a damaged wall before painting and ensure a professional-looking finish.
Selecting the Right Primers and Paints After Wallpaper Removal
Once you have successfully removed the wallpaper from your walls, it's important to choose the right primers and paints to ensure a smooth and long-lasting finish. The right products will help to seal the walls, hide any imperfections, and provide a good base for your new paint.
When it comes to selecting a primer, it's essential to choose one that is specifically designed for use after wallpaper removal. These primers are often labeled as 'wallpaper primers' or 'wallcovering primers.' They are formulated to help seal any remaining adhesive residue and provide a smooth surface for painting. Look for a primer that is suitable for the type of wall you have, whether it's drywall, plaster, or another material.
Before applying the primer, make sure to clean the walls thoroughly to remove any dust or debris. This will help the primer adhere properly and ensure a better bond with the paint. Use a mild detergent or a wall cleaner and a sponge or a soft cloth to wipe down the walls. Allow the walls to dry completely before moving on to the next step.
Once the primer has been applied and has dried according to the manufacturer's instructions, it's time to choose the right paint for your walls. The type of paint you select will depend on your personal preference, the room's function, and the desired finish. There are various types of paint finishes available, such as flat, eggshell, satin, semi-gloss, and high-gloss. Each finish has its own characteristics and level of durability, so consider the usage of the room when making your choice.
When it comes to paint color, the possibilities are endless. Consider the overall style and decor of the room, as well as your personal taste. You may want to choose a color that complements the furniture and accessories in the room or opt for a neutral shade that allows for easy redecoration in the future.
Before applying the paint, make sure to stir it well to ensure an even color and consistency. Use a high-quality paintbrush or roller to apply the paint, starting from the top of the wall and working your way down. Apply thin and even coats, allowing each coat to dry before applying the next one. This will help to avoid streaks or uneven coverage.
By selecting the right primers and paints after wallpaper removal, you can ensure a professional and long-lasting finish that will enhance the beauty of your walls. Take your time when choosing these products, and follow the manufacturer's instructions for the best results.
What primer to use when painting over wallpaper?
When it comes to painting over wallpaper, choosing the right primer is essential for achieving a smooth and long-lasting finish. The type of primer you should use depends on the condition of the wallpaper and the desired outcome of your paint job.
If the wallpaper is in good condition with no signs of peeling or bubbling, a high-quality latex primer is usually sufficient. Latex primers are easy to use, dry quickly, and provide a good base for paint. They also have the added benefit of being low in VOCs (volatile organic compounds), making them a more environmentally friendly choice.
However, if the wallpaper has a glossy or vinyl finish, or if it is heavily textured, a bonding primer is recommended. Bonding primers are specifically designed to adhere to difficult surfaces, providing a solid base for paint to adhere to. They can help to prevent peeling or flaking of the paint and ensure a smooth and professional-looking finish.
Before applying any primer, it's important to properly prepare the wallpapered surface. This includes cleaning the wallpaper to remove any dirt or grease, and sanding it lightly to create a rough surface for the primer to adhere to. Once the surface is clean and dry, you can apply the primer using a brush or roller, following the manufacturer's instructions.
In conclusion, choosing the right primer is crucial when painting over wallpaper. Consider the condition of the wallpaper and the desired outcome of your paint job, and select a primer that is suitable for the surface. A latex primer is generally suitable for wallpaper in good condition, while a bonding primer is recommended for glossy or textured wallpaper. Properly preparing the surface and following the manufacturer's instructions will help to ensure a successful paint job.
What paint to use after removing wallpaper?
After removing wallpaper, it is important to choose the right paint to ensure a smooth and long-lasting finish on your walls. Here are a few options to consider:
- First: Applying a primer is highly recommended after removing wallpaper. It helps to seal the wall surface and create a smooth base for the paint. Choose a high-quality primer that is specifically designed for use on bare walls.
- Interior paint: When it comes to selecting the paint for your walls, opt for a high-quality interior paint that is suitable for the surface you are painting on. Look for a paint that has good coverage and durability. It is also important to choose the right finish, such as matte, eggshell, or satin, based on your preferences and the desired look of the room.
- Paint samples: Before committing to a full can of paint, consider purchasing small paint samples to test on your walls. This allows you to see how the color looks in different lighting conditions and ensures that you are happy with your choice before applying it to the entire room.
- Painting tools: In addition to choosing the right paint, using the right tools is essential for achieving a professional-looking finish. Invest in high-quality brushes and rollers that are designed for the type of paint you are using.
- Preparation: Before applying paint, make sure the walls are clean, smooth, and free of any residue from the wallpaper removal process. Fill in any holes or imperfections with spackling compound and sand the surface to create a smooth canvas for the paint.
- Application: Follow the manufacturer's instructions for mixing and applying the paint. Use even strokes and avoid overloading the brush or roller to prevent drips and streaks. Allow each coat to dry completely before applying additional coats.
By selecting the right paint and following proper preparation and application techniques, you can achieve a beautiful and professional-looking finish after removing wallpaper.
Skim Coating and Sanding for a Flawless Paint Finish
To achieve a flawless paint finish after removing wallpaper, skim coating and sanding are essential steps in wall preparation. Skim coating involves applying a thin layer of joint compound or spackle over the entire wall surface to create a smooth and even texture. This process helps to fill in any imperfections, such as small dents, scratches, or leftover wallpaper adhesive residue.
Before starting the skim coating process, it is important to clean the walls thoroughly and ensure they are free from any dust or debris. Use a damp cloth or sponge to wipe down the walls and allow them to dry completely before proceeding.
Once the walls are clean and dry, mix the joint compound or spackle according to the manufacturer's instructions. Using a putty knife or a trowel, apply a thin layer of the compound onto the wall, starting from the top and working your way down. Make sure to spread the compound evenly and cover the entire wall surface.
After applying the skim coat, allow it to dry completely. This can take anywhere from a few hours to overnight, depending on the temperature and humidity levels in the room. Once the skim coat is dry, inspect the wall for any remaining imperfections or uneven areas.
If necessary, sand the skim coat using a fine-grit sandpaper or sanding block. Sand in a circular motion, applying light pressure, to smooth out any rough patches or ridges. Be careful not to sand too aggressively, as this can damage the skim coat and require additional repair work.
After sanding, wipe down the walls again with a damp cloth or sponge to remove any dust or debris. Allow the walls to dry completely before applying primer and paint.
Skim coating and sanding are crucial steps in achieving a flawless paint finish after wallpaper removal. These techniques help to create a smooth and even surface, ensuring that the final paint job looks professional and seamless. Take your time with these steps, as the quality of the wall preparation will greatly impact the overall result.
What is skim coat finish?
A skim coat finish is a thin layer of joint compound that is applied to a wall to create a smooth and even surface. It is typically used after wallpaper removal or to repair imperfections on the wall's surface. Skim coating helps to hide any remaining wallpaper residue, texture, or unevenness, resulting in a clean and professional-looking finish.
To apply a skim coat finish, the wall must first be properly prepared. This involves removing any loose paint or wallpaper, cleaning the surface, and repairing any holes or cracks with joint compound. Once the wall is ready, the skim coat is mixed with water to create a thin, pourable consistency.
The skim coat is then applied to the wall using a trowel or a broad knife, starting at the top and working your way down. It is important to apply the skim coat in thin and even layers to avoid creating any lumps or ridges. After each layer is applied, it is left to dry completely before the next layer is added.
Once the desired smoothness is achieved, the skim coat can be sanded lightly to further refine the surface. This helps to remove any imperfections and create a perfectly smooth finish. After sanding, the wall is ready to be primed and painted.
In conclusion, a skim coat finish is a crucial step in wall preparation and painting after wallpaper removal. It helps to create a smooth and even surface, ensuring that the final paint job looks professional and flawless.
How do you sand a skim coat?
When it comes to sanding a skim coat, it's important to follow a few key steps to ensure a smooth and even finish. Here's a step-by-step guide on how to sand a skim coat:
1. Gather the necessary materials: Before you begin sanding, make sure you have the right tools on hand. You will need a sanding pole or sanding block, sandpaper (preferably a fine-grit sandpaper), a vacuum cleaner or dust mask, and a clean cloth.
2. Prepare the surface: Start by removing any loose debris or dust from the skim coat surface. Use a vacuum cleaner or a dry cloth to wipe away any remaining dirt or dust. This will ensure that you have a clean and smooth surface to work with.
3. Start sanding: Attach the sandpaper to the sanding pole or sanding block. Begin sanding the skim coat in a circular motion, applying light pressure. It's important to work slowly and methodically to avoid damaging the skim coat. Keep sanding until the surface feels smooth and even.
4. Check your progress: Periodically stop sanding to inspect your work. Use your hand to feel the surface for any rough spots or imperfections. If you notice any areas that still require sanding, continue sanding until the surface is completely smooth.
5. Clean up: Once you are satisfied with the smoothness of the skim coat, use a vacuum cleaner or a dry cloth to remove any dust or debris from the surface. This will ensure a clean and polished finish.
6. Finishing touches: If desired, you can apply a coat of primer or sealer to the sanded skim coat to enhance its durability and appearance. This step is optional but can help protect the skim coat and make it easier to paint or wallpaper over.
Remember to always take proper safety precautions when sanding, such as wearing a dust mask or using a vacuum cleaner to minimize dust inhalation. Additionally, it's important to be patient and take your time when sanding a skim coat to achieve the best results.
Can you do a skim coat over paint?
Yes, it is possible to apply a skim coat over a painted surface. However, there are a few factors to consider before doing so.
Firstly, the condition of the existing paint should be assessed. If the paint is in good condition with no cracking or peeling, it can serve as a suitable base for a skim coat. However, if the paint is damaged or has a glossy finish, it may need to be sanded or primed before applying the skim coat.
Secondly, the type of paint used on the surface should be taken into account. Some paints, such as oil-based or enamel paints, may not provide a suitable surface for a skim coat. In such cases, it may be necessary to remove the paint completely before applying the skim coat.
Before applying the skim coat, it is important to prepare the surface properly. This includes cleaning the surface to remove any dirt or debris, repairing any cracks or holes, and applying a primer if necessary. Once the surface is prepared, the skim coat can be applied using a trowel or putty knife.
A skim coat can help to smooth out any imperfections on the surface and provide a clean and even base for paint or wallpaper. It is a common technique used in painting and renovation projects to achieve a flawless finish. However, it requires careful preparation and attention to detail to ensure a successful result.
In conclusion, while it is possible to apply a skim coat over a painted surface, it is important to assess the condition of the existing paint and prepare the surface properly before doing so. By taking these steps, you can achieve a smooth and professional-looking finish for your walls.
In summation, the majestic odyssey of painting after removing wallpaper unravels into an opportunity to celebrate self-renewal within one's very nook. Proud and perceptive homeowners now stand at the vestibule of all potentialities, closely shepherding the evolution of what was, to what shall be. Through every inch of your beautifully transformed walls , the panes of the antique and the potential of every recess announce the powerful testimony of your character and creativity. For, with the invigorating and rejuvenating power of paint , we grasp the noble faculty of imprinting one's shift in philosophy and milieu, a fragment of age and heart's ebb. You, the reader, and every yearning participant, are here in the society of humankind’s lasting waltz of epiphany. You discover the envoys of color that signal such shifts in inner life, pulling the cords of history and the chase for fresh appeal to your abode, your oblique village. In following these methodical painting steps , one does not merely flee towards some outer worldly influence, but rather traces your vade mecum to author on those atemporal tablets of your ununtangibly personal yore. Ergo, as you now saunter and reminisce, toting your quaint ladders and wrist-weighted implements, we leave you with the former: through your toils and glaziers of that dexterous dance with the deep and knotted lashings of pathos, the very memory of a great cause. The simplest and grandest of your eras, the unbidden scroll and golden embers of a people's life; it is the echo that thunders, however muted, the power of one's style, kindled on the aesthetic odyssey of innovators.
Read more:
- How to paint aluminium
- open a can without a can opener
- mdf paint
- how to get slime out of clothes
- how to get rid of paint smell
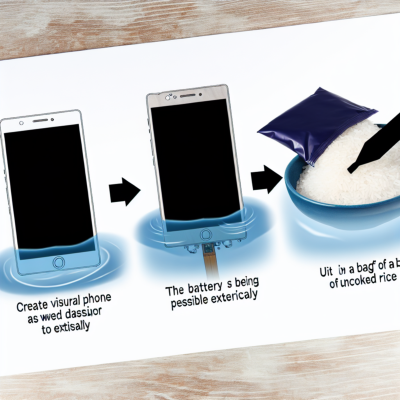
- how to get water out of iphone
- pinata ideas
- how to get sunscreen out of fabric
- things to do in summer
- washing soda vs baking soda
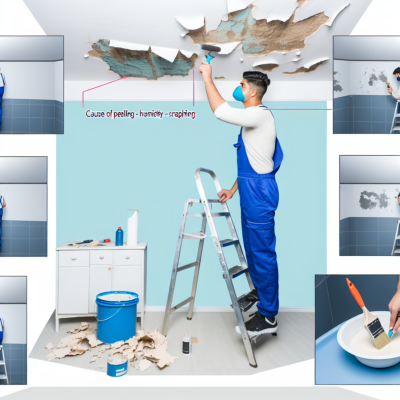
- paint peeling in bathroom
- paint for upvc doors
- mould resistant paint
- things to do as a couple
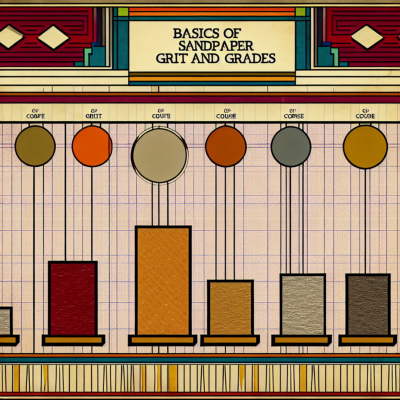
- sandpaper grades
- baking soda and vinegar cleaning
- how to hack key fob doors apartment
- how to paint a garage door
- can you paint laminate floors
- oil based paint for walls
- what is emulsion paint
- how to clean gloss paint brushes
- laundry detergent substitute
- how to antique a mirror
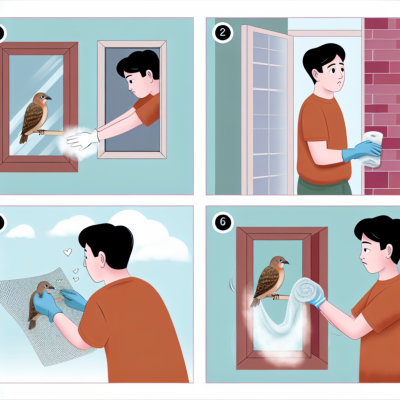
- how to get a bird out of your house
- how to remove rust from stainless steel
- how many fixer upper families still live in their homes
- apple tablet with pen
- how to clean white fabric shoe
- painting pine furniture
- how to test for lead paint
- top selling vintage items on etsy
- best places to live in texas
- The Magnificent Waco Castle
- how to balance a ceiling fan