If you have pine furniture that is looking a bit tired and in need of a refresh, painting it can be a great solution. Painting pine furniture not only gives it a new lease of life, but it also allows you to customize it to match your personal style and décor. Whether you want to achieve a rustic, distressed look or a sleek, modern finish, this complete painting guide will provide you with all the tips and techniques you need to transform your pine furniture into a stunning statement piece.
Preparation is key
Before you begin painting your pine furniture, it is important to properly prepare the surface. Start by removing any hardware such as knobs or handles. Next, give the furniture a thorough cleaning to remove any dirt or grime. You can use a mild soap and water solution or a gentle wood cleaner. Once the furniture is clean, lightly sand the surface to create a smooth and even base for the paint. Be sure to wipe away any dust with a clean cloth before moving on to the next step.
Choosing the right paint
When it comes to choosing the right paint for your pine furniture, there are a few factors to consider. First, decide whether you want to use oil-based or water-based paint. Oil-based paint tends to provide a smoother and more durable finish, but it also has a longer drying time and can emit strong fumes. Water-based paint, on the other hand, dries quickly and is low in odor, but it may not be as durable. Additionally, consider the color and finish you desire. For a natural look, you can opt for a clear varnish or a stain. If you want to add a pop of color, choose a paint that complements your existing décor.
Applying the paint
Before you start painting, make sure to protect the surrounding area with drop cloths or newspapers. Begin by applying a primer to the furniture to ensure better adhesion of the paint. Once the primer is dry, use a brush or roller to apply thin, even coats of paint. It is better to apply several thin coats rather than one thick coat, as this will prevent drips and ensure a smoother finish. Allow each coat to dry completely before applying the next. Finally, finish off with a clear topcoat to protect the paint and add a glossy or matte finish, depending on your preference.
By following this complete painting guide, you can transform your pine furniture into a stunning piece that perfectly complements your décor. With a little preparation and the right materials, you can achieve a professional-looking finish that will make your furniture look brand new.
Preparing Pine Furniture for Painting
Before you begin painting your pine furniture, it is important to properly prepare the surface to ensure the best possible outcome. Follow these steps to prepare your pine furniture for painting:
1. Clean the surface: Start by cleaning the surface of the furniture to remove any dirt, dust, or grease. Use a mild detergent mixed with water and a soft cloth to gently clean the surface. Rinse with clean water and allow the furniture to dry completely.
how to paint a garage door
2. Sand the surface: Next, sand the surface of the furniture to create a smooth and even base for the paint. Use a medium-grit sandpaper and sand in the direction of the wood grain. Be sure to sand all areas, including corners and edges. After sanding, wipe away any dust with a damp cloth.
3. Fill in any imperfections: Inspect the furniture for any dents, scratches, or holes. Use a wood filler to fill in these imperfections and allow it to dry according to the manufacturer's instructions. Once dry, sand the filled areas to smooth them out with the rest of the surface.
4. Apply a primer: Applying a primer before painting will help the paint adhere better to the surface and provide a more even finish. Choose a primer that is suitable for pine furniture and apply it according to the manufacturer's instructions. Allow the primer to dry completely before moving on to the next step.
5. Lightly sand the primer: Once the primer is dry, lightly sand the surface with a fine-grit sandpaper to remove any roughness. This will help create a smoother surface for the paint to adhere to.
6. Clean the surface again: Before applying the paint, clean the surface once again to remove any dust or debris that may have accumulated. Use a damp cloth to wipe away any residue and allow the furniture to dry completely.
7. Apply the paint: Finally, it's time to apply the paint. Choose a paint color and finish that suits your desired look. Use a brush or roller to apply the paint evenly, working in the direction of the wood grain. Apply multiple thin coats for better coverage and allow each coat to dry before applying the next one.
8. Protect the surface: Once the paint has dried completely, consider applying a clear protective finish, such as varnish or polyurethane, to protect the surface and enhance the durability of the paint. Follow the manufacturer's instructions for applying the protective finish.
By properly preparing your pine furniture before painting, you can ensure a professional-looking and long-lasting finish. Take your time and follow each step carefully for the best results.
How do you prepare pine for painting?
Preparing pine furniture for painting is an essential step to ensure a smooth and long-lasting finish. Follow these steps to properly prepare your pine furniture:
1. Clean the surface: Start by removing any dust, dirt, or grease from the surface of the pine furniture. Use a mild detergent mixed with warm water and a soft cloth to gently clean the surface. Rinse with clean water and allow it to dry completely.
2. Sand the surface: Pine furniture often has a rough texture, so it's important to sand the surface to create a smooth and even base for the paint. Use medium-grit sandpaper and sand in the direction of the grain. Sanding will also help to remove any previous finishes or imperfections in the wood.
3. Fill any holes or cracks: Inspect the pine furniture for any holes, cracks, or imperfections. Use a wood filler to fill in these areas, following the manufacturer's instructions. Once the filler is dry, sand it down to make it level with the rest of the surface.
4. Prime the surface: Applying a primer is crucial when painting pine furniture, as it helps the paint adhere better and provides a more durable finish. Choose a primer suitable for pine wood and apply it evenly using a brush or roller. Allow the primer to dry completely before moving on to the next step.
5. Sand again: After the primer has dried, lightly sand the surface again with fine-grit sandpaper. This will help to smooth out any rough areas or brush marks left by the primer.
6. Clean the surface again: Before applying the paint, make sure to remove any dust or debris that has accumulated on the surface. Use a tack cloth or a damp cloth to wipe down the furniture and ensure a clean painting surface.
7. Apply the paint: Finally, it's time to apply the paint of your choice. Use a brush or a roller, depending on the size and texture of the furniture. Apply thin and even coats, allowing each coat to dry completely before applying the next. Follow the manufacturer's instructions for drying times and recommended number of coats.
By properly preparing your pine furniture for painting, you can achieve a professional and long-lasting finish that will enhance the beauty of your furniture and protect it for years to come.
Can you paint over pine furniture without sanding?
Yes, it is possible to paint over pine furniture without sanding, but it is not recommended. Sanding the furniture before painting helps to remove any existing finish, smooth out imperfections, and create a better surface for the paint to adhere to.
When you skip the sanding step, the paint may not adhere well to the surface of the pine furniture, resulting in a less durable and less professional-looking finish. The paint may also peel or chip off more easily over time.
However, if you are short on time or do not want to deal with the mess and effort of sanding, there are alternative options. One option is to use a deglosser or liquid sandpaper, which can help to roughen up the surface and remove any glossy finish without the need for sanding.
Another option is to use a bonding primer specifically designed for unpainted or previously finished surfaces. This type of primer helps to create a strong bond between the paint and the furniture, even without sanding.
It is important to note that while these alternative methods may save you time and effort, they may not provide the same level of durability and longevity as properly sanded and prepared surfaces. If you want the best results and a long-lasting finish, it is recommended to take the time to sand the pine furniture before painting.
Choosing the Right Paint for Pine Furniture

When it comes to painting pine furniture, choosing the right paint is crucial for achieving the desired look and ensuring longevity. Here are some factors to consider when selecting paint for your pine furniture:
- Type of paint: There are various types of paint available for furniture, such as latex, oil-based, and chalk paint. Each type has its own characteristics and finish, so consider the look you want to achieve before making a choice.
- Durability: Pine furniture is prone to scratches and dents, so it's important to choose a paint that offers durability and protection. Look for paints that have a high resistance to wear and tear.
- Finish: The finish of the paint can significantly impact the overall look of your pine furniture. Choose between matte, satin, or gloss finishes depending on your personal preference and the style of your space.
- Color: Pine furniture looks beautiful in its natural wood color, but painting it can add a pop of color and transform the piece. Consider the color scheme of your room and choose a paint color that complements it.
- Preparation: Before applying paint to your pine furniture, proper preparation is essential. Make sure to clean the surface of any dirt or dust, sand it to create a smooth finish, and apply a primer to help the paint adhere better.
- Environmentally friendly options: If you prefer to use eco-friendly products, look for paints that are labeled as low VOC (volatile organic compound) or water-based. These paints have fewer harmful chemicals and are better for both your health and the environment.
By considering these factors and choosing the right paint for your pine furniture, you can ensure a beautiful and long-lasting finish that enhances the overall look of your space.
What paint to use on pine wood furniture?
When it comes to painting pine wood furniture, choosing the right paint is essential for achieving a beautiful and long-lasting finish. Pine is a softwood that is prone to absorbing paint unevenly, so it's important to use a paint that will adhere well to the surface and provide good coverage.
One of the best types of paint to use on pine wood furniture is an oil-based paint. Oil-based paints have excellent adhesion and durability, making them ideal for high-traffic pieces of furniture like dressers or tables. They also provide a smooth and glossy finish that enhances the natural beauty of the wood.
If you prefer a water-based paint, look for an acrylic latex paint that is specifically formulated for use on wood. These paints are easy to clean up with soap and water, and they dry quickly, allowing you to complete your project in less time. Additionally, acrylic latex paints are available in a wide range of colors, so you can easily find the perfect shade to match your decor.
Before applying any paint, it's important to prepare the surface of the pine wood furniture. Start by sanding the furniture with a fine-grit sandpaper to smooth out any rough areas and create a clean surface for the paint to adhere to. After sanding, wipe away any dust with a tack cloth or a damp cloth.
Once the surface is prepared, apply a coat of primer to the pine wood furniture. Priming helps to seal the wood and provides a smooth base for the paint. Choose a high-quality primer that is specifically designed for use on wood surfaces.
After the primer has dried, you can start painting your pine wood furniture. Apply the paint in thin, even coats, using a brush or a roller. Allow each coat to dry completely before applying the next one. Depending on the type of paint you choose, you may need to apply multiple coats to achieve the desired coverage.
Finally, once the paint has dried, you can protect your newly painted pine wood furniture with a clear topcoat. A clear topcoat will help to seal the paint and provide added durability. Choose a topcoat that is compatible with the type of paint you used.
By using the right paint and following the proper steps, you can transform your pine wood furniture into a beautiful and stylish piece that will last for years to come.
What is the best finish for old pine furniture?
When it comes to finishing old pine furniture, there are several options to choose from. The best finish for your furniture will depend on the look you want to achieve and the level of durability you desire. Here are some popular finishes for old pine furniture:
- Clear Varnish: Applying a clear varnish can help protect the natural beauty of the wood while adding a glossy finish. This is a great option if you want to showcase the grain of the pine and give it a shiny appearance.
- Something: Using wax is a traditional way to finish pine furniture. It gives the wood a soft and natural look, enhancing its natural color and texture. Wax can also provide a protective layer, making the furniture more resistant to scratches and stains.
- Paint: Painting old pine furniture is a popular choice, as it allows you to completely change the look of the piece. You can choose any color you like and create a smooth or distressed finish, depending on your preference. Just make sure to properly prepare the surface before applying the paint.
- Stain: Staining pine furniture can help enhance its natural beauty by adding color and depth to the wood. There are various shades of stain available, allowing you to achieve the desired look. Make sure to apply the stain evenly and follow it with a protective topcoat.
Ultimately, the best finish for your old pine furniture will depend on your personal style and the overall aesthetic you want to achieve. It's always a good idea to test the finish on a small, inconspicuous area before applying it to the entire piece to ensure you're happy with the results.
What colour goes best with pine furniture?
When it comes to choosing a colour that goes best with pine furniture, there are several options to consider. The natural beauty of pine furniture allows for a variety of colour choices that can complement its warm and inviting appearance.
One popular option is to keep the natural look of the pine by using clear or lightly tinted finishes. This allows the natural grain and texture of the wood to shine through, creating a timeless and classic look.
711 Angel Number
If you prefer a more contemporary or modern look, you can opt for a darker stain or paint colour. Darker shades, such as espresso or charcoal, can add depth and richness to the furniture, creating a sleek and sophisticated look.
For a more rustic or country-inspired look, you can choose earthy tones such as olive green or warm browns. These colours can enhance the natural beauty of the pine, creating a cozy and inviting atmosphere.
If you want to add a pop of colour to your pine furniture, you can choose bold and vibrant shades such as navy blue or deep red. These colours can create a focal point in the room and add a touch of personality to your furniture.
Ultimately, the best colour for your pine furniture depends on your personal style and the overall aesthetic you want to achieve in your space. Whether you prefer a natural, contemporary, rustic, or colourful look, pine furniture can be easily customized to suit your taste.
Remember to always test the colour on a small, inconspicuous area before applying it to the entire piece of furniture. This will ensure that you are happy with the colour and that it complements the pine wood in the best possible way.
With a bit of creativity and a keen eye for design, you can transform your pine furniture into a stunning focal point in any room.
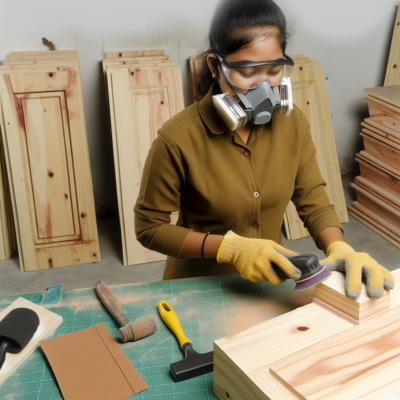
Step-by-Step Guide to Painting Pine Furniture
Painting pine furniture can be a fun and rewarding DIY project. Whether you want to freshen up an old piece or give it a whole new look, painting is a great way to transform pine furniture. Follow these step-by-step instructions to achieve a professional-looking finish.
1. Prepare the Furniture: Start by preparing the furniture for painting. Remove any hardware such as knobs or handles, and clean the surface with a mild soap and water solution. Sand the surface lightly with fine-grit sandpaper to create a smooth and even base for the paint.
2. Prime the Surface: Apply a coat of primer to the pine furniture. This will help the paint adhere better and ensure a long-lasting finish. Use a brush or roller to apply an even layer of primer, following the grain of the wood. Allow the primer to dry completely before moving on to the next step.
3. Choose the Paint: Select a paint color and finish that suits your style and the overall look you want to achieve. Consider using a latex or acrylic paint for its durability and ease of application. You can also choose a chalk paint for a more rustic or vintage look. Make sure to stir the paint well before using.
4. Apply the Paint: Use a brush or roller to apply an even coat of paint to the furniture. Start with the larger surfaces and work your way to the smaller details. Apply the paint in thin, even layers, following the grain of the wood. Allow each layer to dry before applying the next one. Depending on the desired coverage, you may need to apply multiple coats of paint.
washing soda vs baking soda
5. Add Finishing Touches: Once the paint is dry, you can add any desired finishing touches. Consider using a clear topcoat to protect the paint and add durability. You can also distress the furniture by lightly sanding the edges or applying a glaze for a more aged look. Finally, reattach any hardware that was removed earlier.
6. Let the Paint Cure: Allow the paint to cure completely before using or moving the furniture. This can take anywhere from a few days to a couple of weeks, depending on the type of paint used. Follow the manufacturer's instructions for the recommended curing time.
By following these step-by-step instructions, you can successfully paint pine furniture and achieve a beautiful and professional-looking finish. Get creative and have fun transforming your furniture into something new and unique!
How do you prepare pine for painting?
Preparing pine furniture for painting is an essential step to ensure a smooth and long-lasting finish. Follow these steps to properly prepare your pine furniture:
- Start by cleaning the furniture: Remove any dust, dirt, or grime from the surface of the pine furniture using a mild soap and water solution. Gently scrub the surface with a soft cloth or sponge, then rinse with clean water and allow it to dry completely.
- Inspect for any damages: Carefully examine the pine furniture for any damages such as dents, scratches, or chips. Use wood filler or putty to fill in any holes or imperfections. After applying the filler, let it dry and then sand it down until it is smooth and level with the rest of the furniture.
- Sand the surface: Sanding the pine furniture is crucial to create a smooth and even surface for the paint to adhere to. Start with a medium-grit sandpaper to remove any rough spots or uneven areas. Then, switch to a fine-grit sandpaper to further smooth the surface. Always sand in the direction of the wood grain to avoid damaging the furniture.
- Remove sanding residue: After sanding, use a tack cloth or a damp cloth to remove any sanding residue or dust from the surface of the furniture. This step is important to ensure a clean surface for the paint to adhere to.
- Prime the furniture: Applying a coat of primer is recommended to enhance the adhesion of the paint and provide a more even finish. Choose a primer suitable for pine furniture and apply it evenly using a brush or a roller. Allow the primer to dry completely before moving on to the next step.
- Paint the furniture: Once the primer is dry, it's time to paint the pine furniture. Select a paint color of your choice and apply it evenly using a brush or a roller. Start with thin coats and allow each coat to dry before applying the next one. This will help prevent drips and ensure a smooth finish.
- Apply a protective finish: To protect the painted surface and enhance its durability, apply a clear topcoat or sealer. This will help protect the paint from scratches and moisture. Follow the manufacturer's instructions for application and drying times.
By properly preparing your pine furniture before painting, you can achieve a beautiful and long-lasting finish that will enhance the appearance of your furniture for years to come.
What is the best primer for pine paint?
When it comes to painting pine furniture, choosing the right primer is crucial for achieving a professional and long-lasting finish. The best primer for pine paint is one that is specifically designed for use on softwoods like pine.
There are a few key factors to consider when selecting a primer for pine paint:
- Adhesion: Pine has a tendency to absorb paint unevenly, so it's important to choose a primer that provides excellent adhesion to ensure an even and smooth finish.
- Sealing: Pine is known for having knots and other imperfections that can bleed through paint. A primer with good sealing properties will prevent these imperfections from showing through the final coat of paint.
- Sanding: Pine wood can be quite porous, so using a primer that sands easily will help to create a smooth and flawless surface for painting.
- Drying time: Consider the drying time of the primer, as this will affect the overall painting process. Opting for a fast-drying primer can help speed up the project.
Based on these factors, a high-quality oil-based primer is often recommended for painting pine furniture. Oil-based primers provide excellent adhesion, seal knots effectively, and can be easily sanded to create a smooth surface. They also tend to dry relatively quickly, allowing you to move on to the painting stage sooner.
Before applying the primer, make sure to properly prepare the pine furniture by cleaning it thoroughly and sanding it to remove any existing finish or rough spots. Once the primer is applied and dried, you can proceed with painting the furniture using your chosen paint color.
Remember, using the right primer is essential for achieving a professional and durable paint finish on pine furniture. Take the time to choose a high-quality primer that meets the specific needs of pine wood, and you'll be rewarded with a beautiful and long-lasting result.
How do you paint old pine furniture without sanding?
If you have old pine furniture that you want to paint but don't want to go through the hassle of sanding it, there are a few alternative methods you can try. While sanding is typically recommended to ensure a smooth surface for painting, these techniques can help you achieve a decent result without sanding:
- Clean the surface: Start by cleaning the furniture thoroughly to remove any dirt, grease, or wax that may be present. You can use a mild detergent and water solution or a specialized cleaner designed for wood surfaces. Wipe the furniture clean and allow it to dry completely before proceeding.
- Use a deglosser: A deglosser is a chemical solution that can be used to remove the glossy finish from the furniture's surface, making it easier for the paint to adhere. Apply the deglosser according to the manufacturer's instructions, making sure to work in a well-ventilated area. Once the deglosser has been applied, wipe down the furniture to remove any residue.
- Apply a bonding primer: After the surface has been cleaned and deglossed, apply a bonding primer to help the paint adhere to the furniture. Choose a primer that is specifically designed for use on wood surfaces. Apply the primer evenly and allow it to dry according to the manufacturer's instructions.
- Paint with a high-quality paint: Once the primer has dried, you can proceed with painting the furniture. Choose a high-quality paint that is suitable for wood surfaces. Apply the paint evenly using a brush or roller, making sure to follow the paint manufacturer's instructions for drying times and additional coats if needed.
While these methods can help you paint old pine furniture without sanding, it's important to note that sanding is still the most effective way to ensure a smooth and long-lasting finish. If you have the time and patience, it's always recommended to sand the furniture before painting. However, if you're looking for a quicker and easier alternative, these steps can help you achieve a satisfactory result.
Before and After: Transforming Pine Furniture
Transforming pine furniture can be a rewarding and creative project. By giving your furniture a fresh coat of paint, you can completely change its look and feel. Whether you want to update an old piece of furniture or give a new piece a personal touch, painting pine furniture is a great way to add style and personality to your home.
Before you begin your painting project, it's important to prepare the furniture properly. Start by cleaning the surface of the furniture to remove any dust or dirt. Sand the surface to create a smooth and even base for the paint. Fill in any cracks or imperfections with wood filler, and then sand again to ensure a seamless finish.
Once the furniture is prepped, it's time to choose a paint color. Consider the overall style and color scheme of your room when selecting a paint color. If you want a classic and timeless look, opt for a neutral color like white or gray. For a more bold and vibrant look, choose a bright or bold color that complements your room's decor.
Apply the paint using a brush or roller, working in even strokes and following the grain of the wood. Allow the first coat to dry completely before applying a second coat for a more durable finish. If desired, you can also add a layer of clear varnish or sealant to protect the paint and give the furniture a glossy finish.
Once the paint is dry and the furniture is fully transformed, you can add additional touches to enhance its new look. Consider adding new hardware, such as knobs or handles, to give the furniture a fresh and updated appearance. You can also distress the paint or add decorative accents, such as stencils or decals, for a unique and personalized touch.
Transforming pine furniture is a fun and creative project that allows you to breathe new life into old or plain pieces. With a little bit of preparation and some paint, you can completely transform the look of your furniture and create a stylish and personalized piece for your home.
How do you renovate old pine furniture?
If you have old pine furniture that is looking worn out or outdated, renovating it can give it a new lease on life. Renovating old pine furniture involves a few key steps to ensure a successful transformation.
1. Clean the furniture: Start by thoroughly cleaning the furniture to remove any dirt, grime, or old wax. Use a mild detergent and warm water, and be sure to dry the furniture completely before moving on to the next step.
2. Sand the surface: Use sandpaper to gently sand the surface of the furniture. This will help to remove any rough areas and create a smooth surface for painting or staining. Be sure to sand in the direction of the grain to avoid damaging the wood.
3. Repair any damage: Inspect the furniture for any scratches, dents, or other damage. Use wood filler to fill in any holes or cracks, and sand the repaired areas once the filler is dry. This will ensure that the furniture looks like new once it is painted or stained.
4. Choose your finish: Decide whether you want to paint or stain the furniture. Painting can give it a fresh, modern look, while staining can enhance the natural beauty of the wood. Consider the overall style and design of your space when making this decision.
5. Apply the finish: If you choose to paint the furniture, apply a primer first to help the paint adhere properly. Then, apply multiple thin coats of paint, allowing each coat to dry before applying the next. If you choose to stain the furniture, apply the stain with a brush or cloth, following the grain of the wood. Allow the stain to dry and then apply a clear protective finish to seal the wood.
6. Add any desired embellishments: If you want to add a personal touch to the furniture, consider adding embellishments such as new hardware, stencils, or decorative painting techniques. This can further enhance the appearance of the renovated piece.
7. Maintain the furniture: Once you have renovated your old pine furniture, it's important to properly maintain it to ensure its longevity. Avoid placing hot or wet items directly on the surface, and use coasters or placemats to protect it from spills and stains. Regularly dust and clean the furniture to keep it looking its best.
By following these steps, you can successfully renovate your old pine furniture and give it a fresh, updated look that will enhance any room in your home.
Painting pine furniture opens up endless possibilities for customization and self-expression. With the right preparation and materials, even amateurs can transform tired old pine pieces into stunning showstoppers. From a simple color change to intricate faux finishes, your imagination is the only limit. As you browse through the before and after photos, it's clear that paint has the power to turn flea market finds into designer showpieces . So raid your local thrift store, dig those dated dressers out of the basement, and get ready for a DIY adventure. With some sandpaper, primer, and paint, you can reinvigorate your home and infuse it with your unique sense of style for a fraction of the cost of buying new furniture. Don't let the nicks, scratches, or outdated oak hues get you down. Grab a paintbrush and make that pine your own!
Read more:
- How to paint aluminium
- open a can without a can opener
- mdf paint
- how to get slime out of clothes
- how to get rid of paint smell
- how to get water out of iphone
- pinata ideas
- how to get sunscreen out of fabric
- things to do in summer
- washing soda vs baking soda
- paint peeling in bathroom
- paint for upvc doors
- mould resistant paint
- painting after removing wallpaper
- things to do as a couple
- sandpaper grades
- baking soda and vinegar cleaning
- how to hack key fob doors apartment
- how to paint a garage door
- can you paint laminate floors
- oil based paint for walls
- what is emulsion paint
- how to clean gloss paint brushes
- laundry detergent substitute
- how to antique a mirror
- how to get a bird out of your house
- how to remove rust from stainless steel
- how many fixer upper families still live in their homes
- apple tablet with pen
- how to clean white fabric shoe
- how to test for lead paint
- top selling vintage items on etsy
- best places to live in texas
- The Magnificent Waco Castle
- how to balance a ceiling fan